After my tech counselor meeting, I’ve managed to fix the rivets along the front spar of the rudder. While not all of them were bad, rather then go one-by-one, I just decided to drill all of them out along both sides of the front spar. Some of them were hard to judge with the leading edge already rolled, so I just decided to do all (approx 110) of them. I also fixed the 4 over-driven rivets on the VS as well.
On my Vertical Stabilizer Assembly and a Mistake post, I outlined a mistake that I had made in the VS when I bent the nose rib flange by trying to pound a drilled out rivet (prior to perfecting my rivet removal technique). Vans had said it was okay to bend back and build on, which I did. I never did quite bend it back good enough to not leave a small gap between the flange and the skin. This made riveting difficult, and I was not too happy with how it had come out. This is one topic that I had discussed with the tech counselor, and we talked about drilling it out and putting a Cherry Max rivet in there in the hopes that it would capture the flange while pulling and close the gap. After attempting that, I’m still not happy with the results.
There was one other picture that I had taken of the bend in the flange and when I looked at it at the time, I swore was just the primer that had come off at the bend and not a crack, but my gut was telling me between that picture and being unhappy with this nose rib riveting, I should open up the VS and fix it the right way.
So I looked at replacement costs for the nose rib and probably a new skin (approx. $100) so a no brainer. I probably don’t really need a new skin, but I also have a small outward dent from the corner of the bucking bar in one spot that likely only I’ll ever see, this would be a good opportunity to fix that small blemish. So away I went drilling out the skin of the already finished VS! Yikes!
I’ve only got one side of the skin off at this point, and I’m glad I opened her up! I wiped off the primer with Acetone and I’m now 100% sure that there is a crack in my nose rib where it bent.
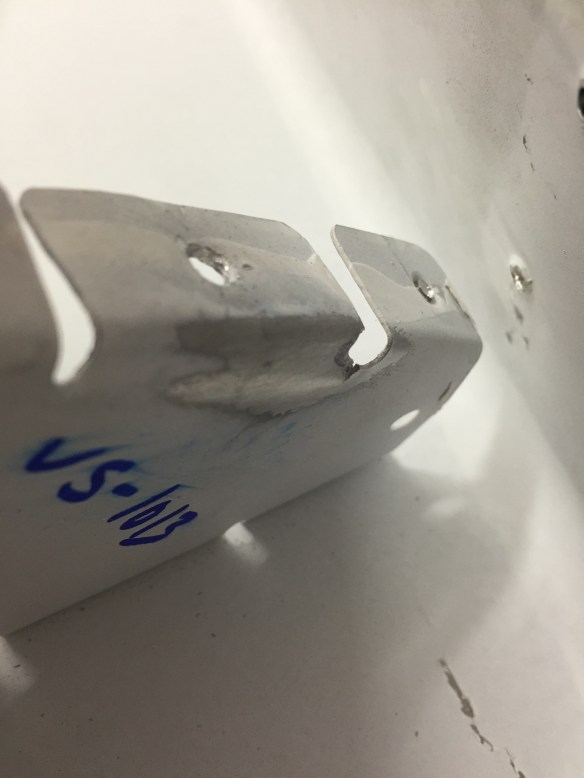

Close up after bending a little to see if it really was a crack.
Moral of the story is to trust your instinct. When something doesn’t seem right, go make it right. I know I’ll sleep better at night knowing that this is fixed and solid. The minor inconvenience now is nothing in comparison to seeing a fully developed crack later down the line.
Now it’s off to vacation for a couple of weeks. I’ll order the parts when I return and keep making progress on the elevators in the meantime.


