
Once I temporarily installed the upper forward fuselage, it was on to drilling the piano hinges around the perimeter of the firewall for the cowling. Based on what I’ve read on lots of other builders sites is that the bottom-most piano hinge should be swapped out for either an extruded kind, or just use a piece of .063″ sheet cut to the same length as the plans and the width to match the width of the piano hinge. I had plenty of sheet stock to do this, so I chose that method. Later when the cowling is attached, this sheet stock will have nut plates added for screws to attach the cowling with. I’m also thinking about whether or not I want to do Cam Locks for at least to top part of the cowling along the firewall line. I’ve heard that the piano hinges are sort of a pain and it will be the half of the cowling that gets taken on and off quite a bunch. I’m certainly leaning that way and didn’t rivet on the piano hinges for those just yet for that reason. I’m okay with the screws on the bottom and the piano hinges along the sides for the bottom cowl half.

Clamping the piano hinge along the top curve.

drilled and cleo’ed in place

Side piano hinge

Lower hinge replaced with a piece of aluminum
With that done, it was time to work on section 42. The rear seat back frames. Going through my phone, I didn’t take any pics as I went though this process. Just the end result which I finished tonight with some riveting and cutting the hinge pins in half and bending them.


Closeup of the hinge pin halves with a 90 degree bend, inserted from the center of the hinge

We have rear seat backs!!
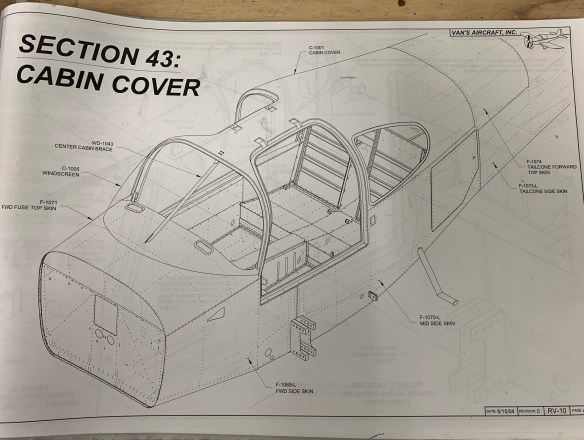
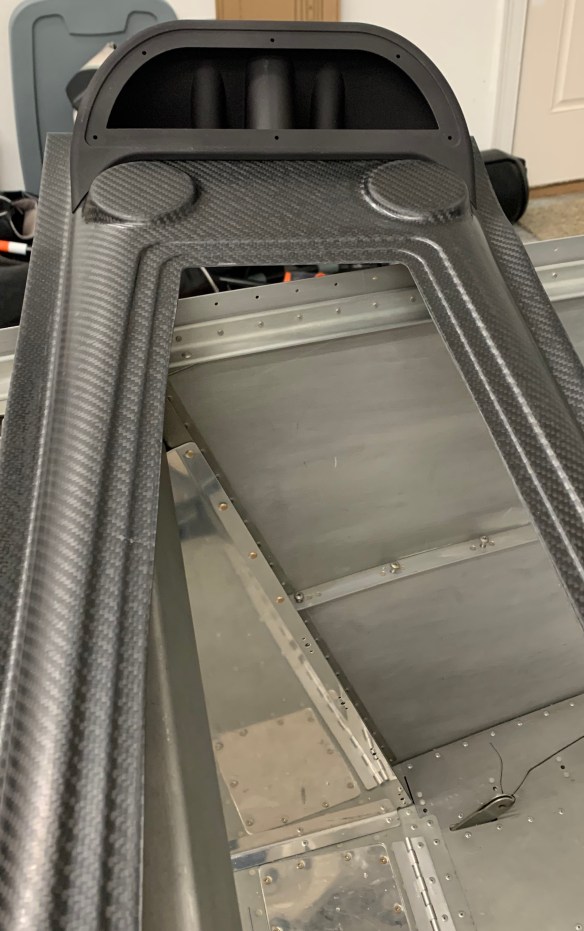
So that leaves us at the next of several daunting tasks.. Fiberglass hell, or did I say “Fun”?? Cabin top starts tomorrow.
I did receive in my overhead console and switch pod from Aerosport Product last week that will go along the entire length of the cabin top in the center. This will house 4 air vents, and lighting. I haven’t 100% decided on what is going in the switch pod yet, but likely either rheostats for environmental controls, or lighting switches (nav/strobes, taxi, landing, cabin, etc…) . Once this is mounted to the plane, it will really start looking like an airplane.

Today was also a fun day for me because a fellow VAF follower had reached out to see about coming over to visit the project. I do like to show it off and talk about it and who knows, maybe get someone else into taking up this hobby. We spent about an hour looking over the plane and all the pieces and then got to work on a spare toolbox practice project I had lying around. A few hours later it was completed. I think my guest got an appreciation for what the actual build process with metal work is like. It certainly seemed to me like he was a natural and picked it all up very quickly. It’s my way to try to give back as much as I can.
