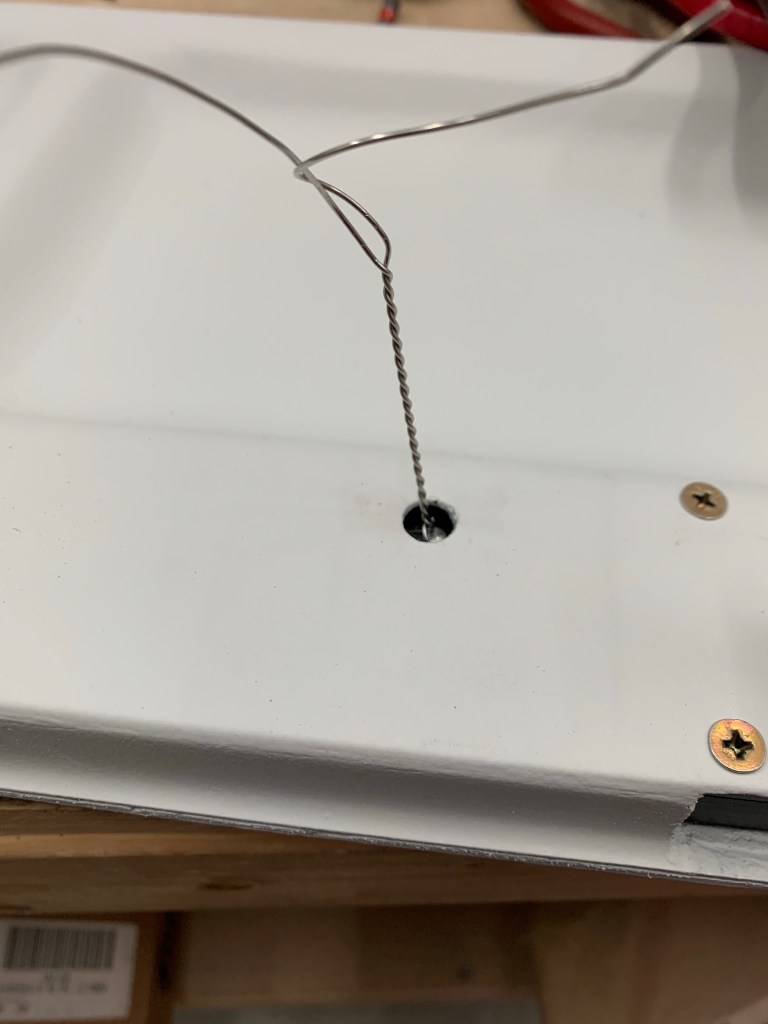
Now that the doors are painted, it was time to put them back together, including the handles and associated racks.. I pulled out the safety wire and finalized the connection between this rod from the Planearound kit to the middle rack assembly. First was to safety wire around the body of the rod leaving plenty of length to the ends to pull through the door and the access hole in the door.
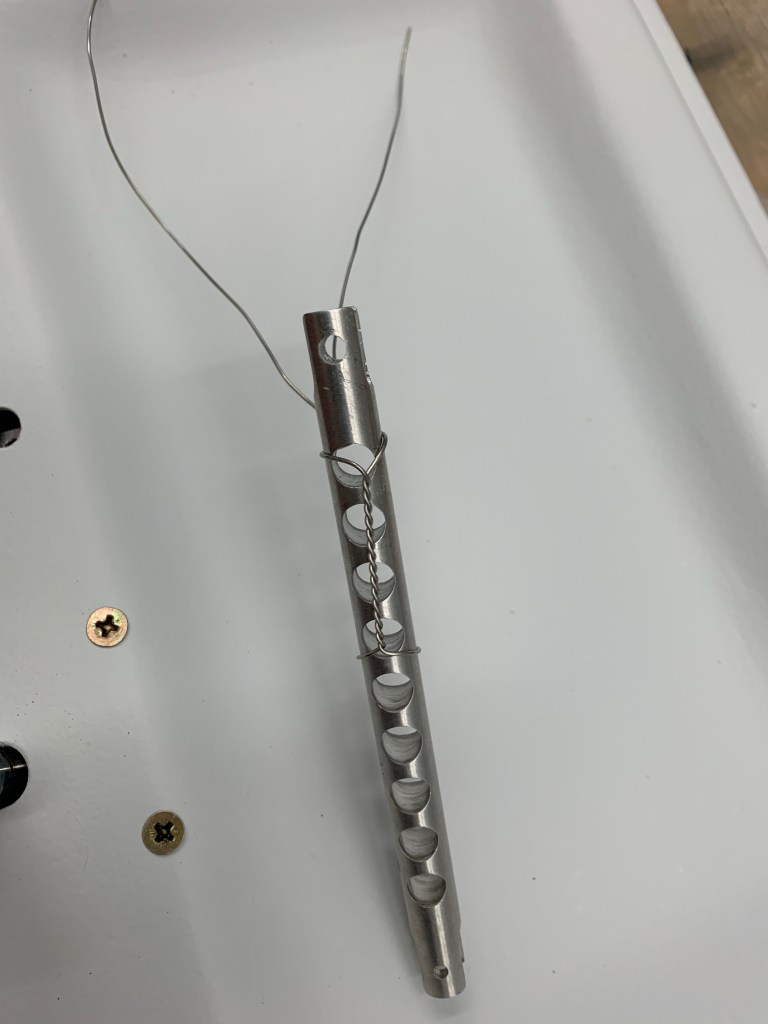
I fished the safety wire up through the hole with the help of needle nose pliers.

Then the wire is passed through the hole on the plane around pin that secures the rod to the rack (inside the door)
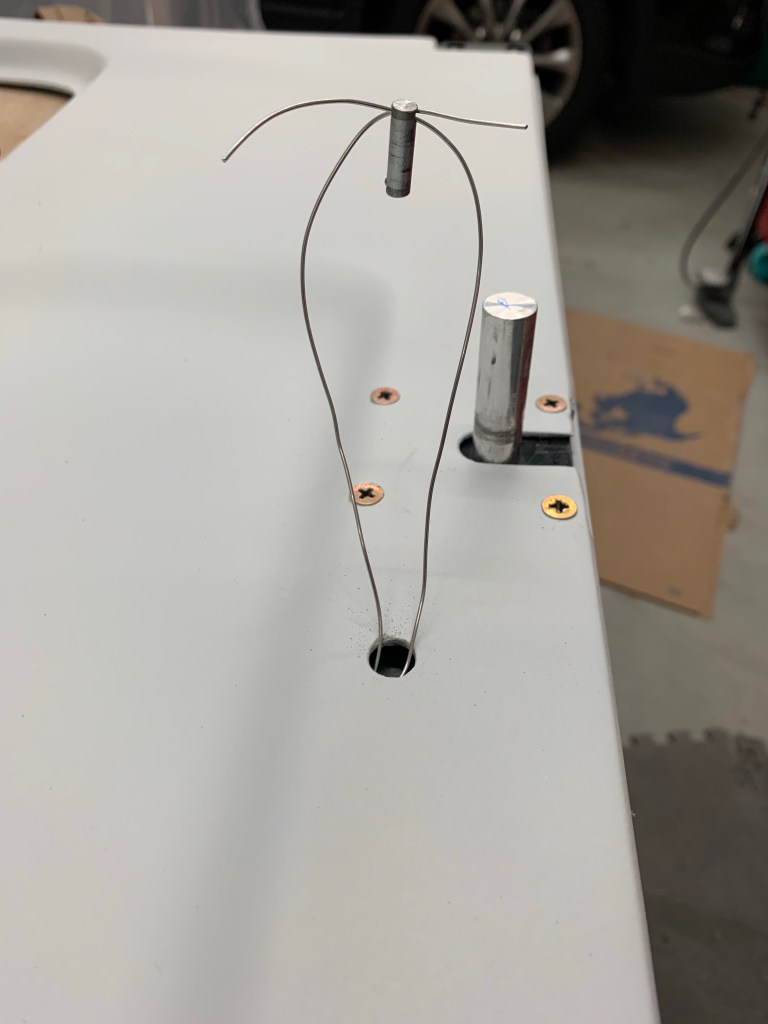
Pulling the ends of the wire causes the pin to slide downward and into the hole.

Pin pushed into the holes connecting the rod and rack.

Final step is to twist the wire, snip, and tuck the end into the inside of the door ensuring that it doesn’t snag up on anything while operating the hinges.
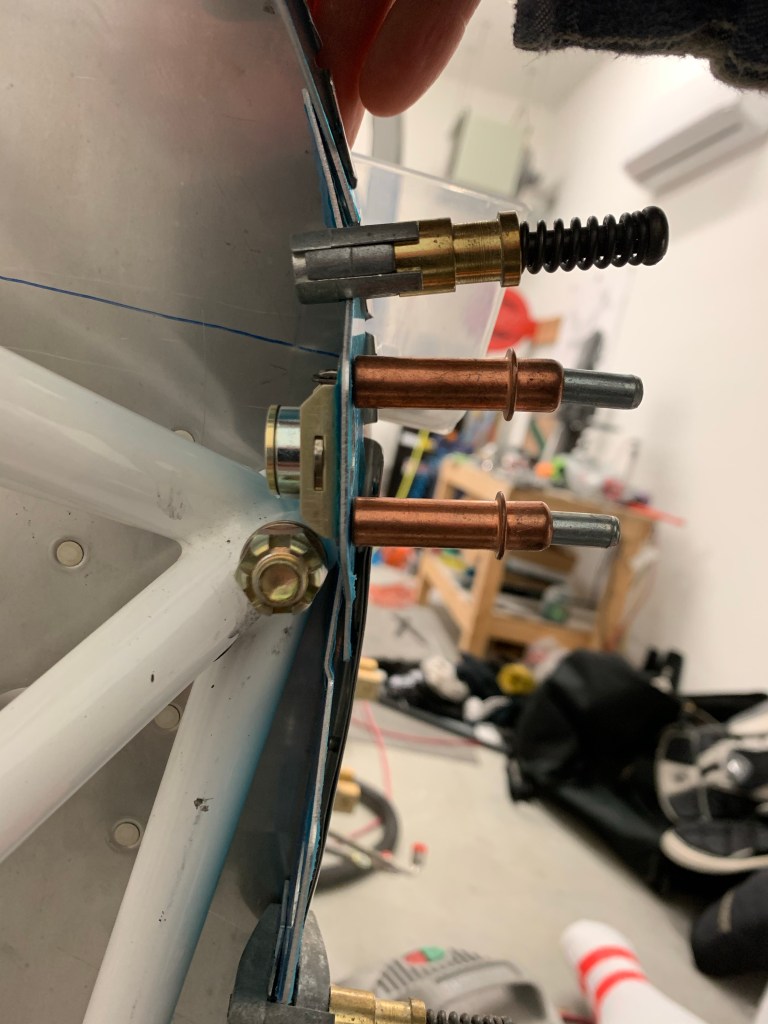
I then cut and sanded the Aerosport carbon fiber door sil covers. Reason for doing this now is I need to place the Planearound Cam blocks on the sil, and this will add a small amount of height. I also wanted to drill through this while match drilling the block to the door sil. As you may see below, I had to also cut out a notch from the micro that I had previously applied to get the cam block to sit completely on the sil and provide enough edge distance.


With that done, it allowed me to place the cam block on the sil, drill, and setup the cam location.

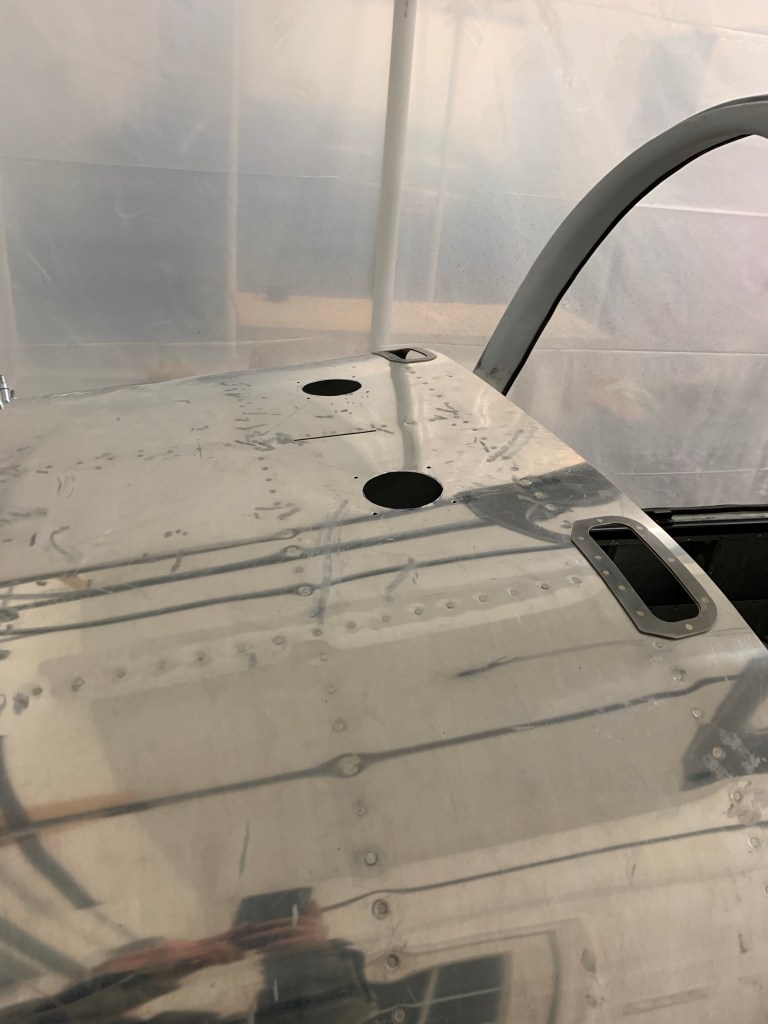
I also spent some time cutting 3″ holes in the upper forward fuselage for defrost fans/avionics cooling.

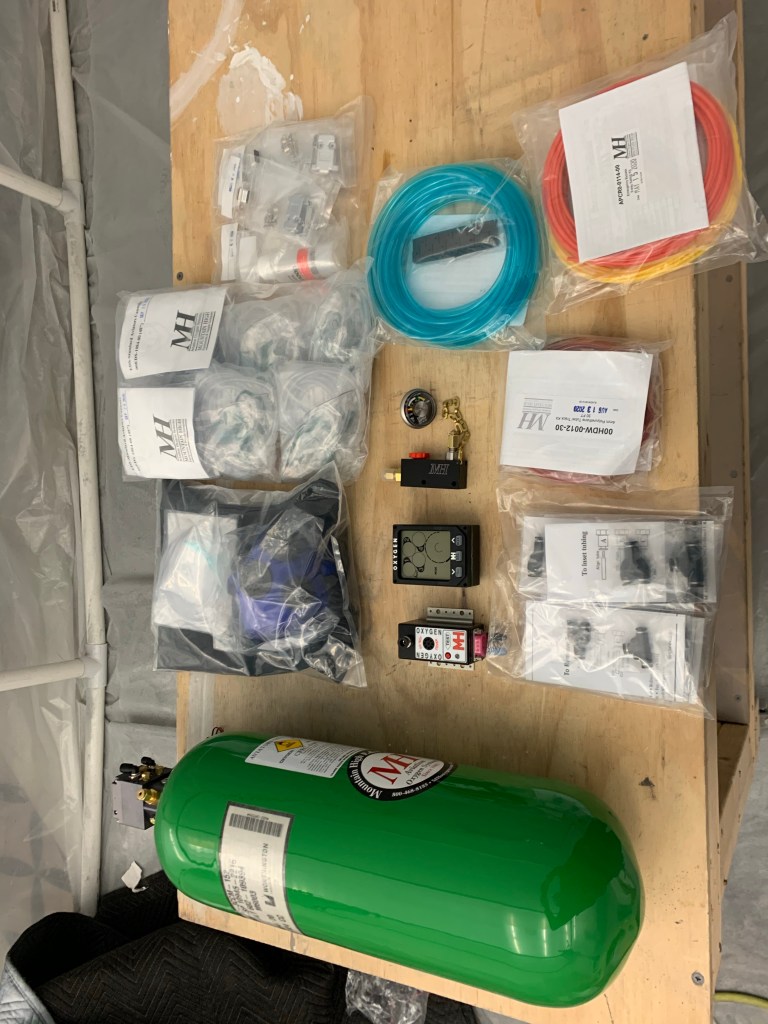
Not that I didn’t know it was coming, but I’m quickly realizing that I’m moving into the expensive part of the build. Some recent goodies that showed up are the Mountain high 4ip oxygen system and my Aerosport 310 Instrument panel!

I also placed a deposit on my engine build planned for April of 2021. Still hoping to go to Aerosport Power in Kamloops, BC Canada in April to build my engine with a tech for 3 days with their build school, but we shall see. Border is still closed with no opening in sight. I also ordered an Airflow systems Air Conditioning system to install as well. It will add some time and expense, but it’ll be worth it hauling the family around in the summer months and taking the edge off.
I then got to installing the engine mount by match drilling the holes and placing bolts in place as I went. One word of advise I saw from others was to start at the lower center holes and work upwards. This goes against the plans stating start at the top hole. The mount needed to be pulled outward a bit to match the center of the pre-drilled smaller holes in the firewall. All of the bottom holes aligned well from the start and allowed less stretching of the mount outward to get the hole drilled.
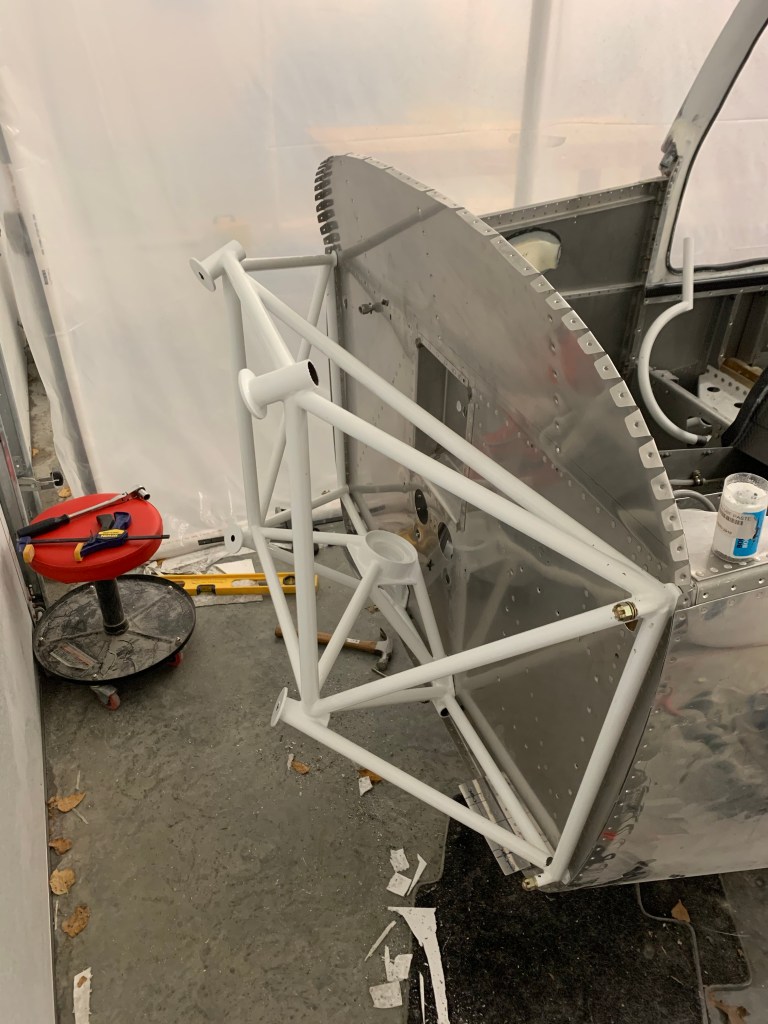
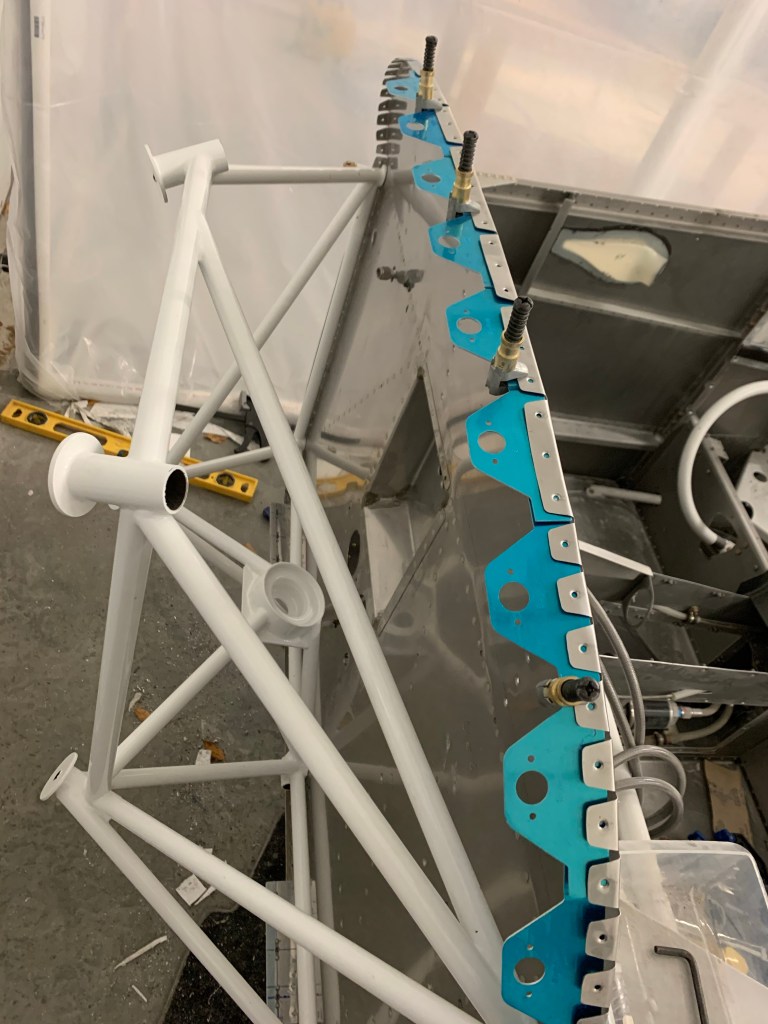
With the engine mount in place, I set out to start working on the sky bolt 1/4 turn fastener install. Really just the flanges for now. The rest will come when I am fitting the cowl after the engine is hung. I chose to install the Skybolts around the entire perimeter of the Firewall. I’ll keep the hinge and pin for the top/bottom cowl split. I played around with placement of the flanges keeping in mind to avoid any interference with the engine mount and the sky bolt receptacle.