
It’s really exiting to have the last major piece of the puzzle in hand.. There is still so much to finish up…, but it’s encouraging and helps me to keep grinding away towards completion.
To recap the configuration:
- Triple Garmin 3GX touch screens
- GTN650 IFR Navigator
- Dual GSU25 ADAHRS
- G5 Backup Attitude Indicator
- GMC507 Autopilot Head
- GMA245 Audio Panel
- GEA24 EIS (Engine monitoring)
- GTR20 Remote COM (COM2)
- GTX45 Remote Transponder
- SDS EFII Controller
- Mountain High EDS-4ip 4 place oxygen controller.
- GDL-51R Remote Sirius XM receiver
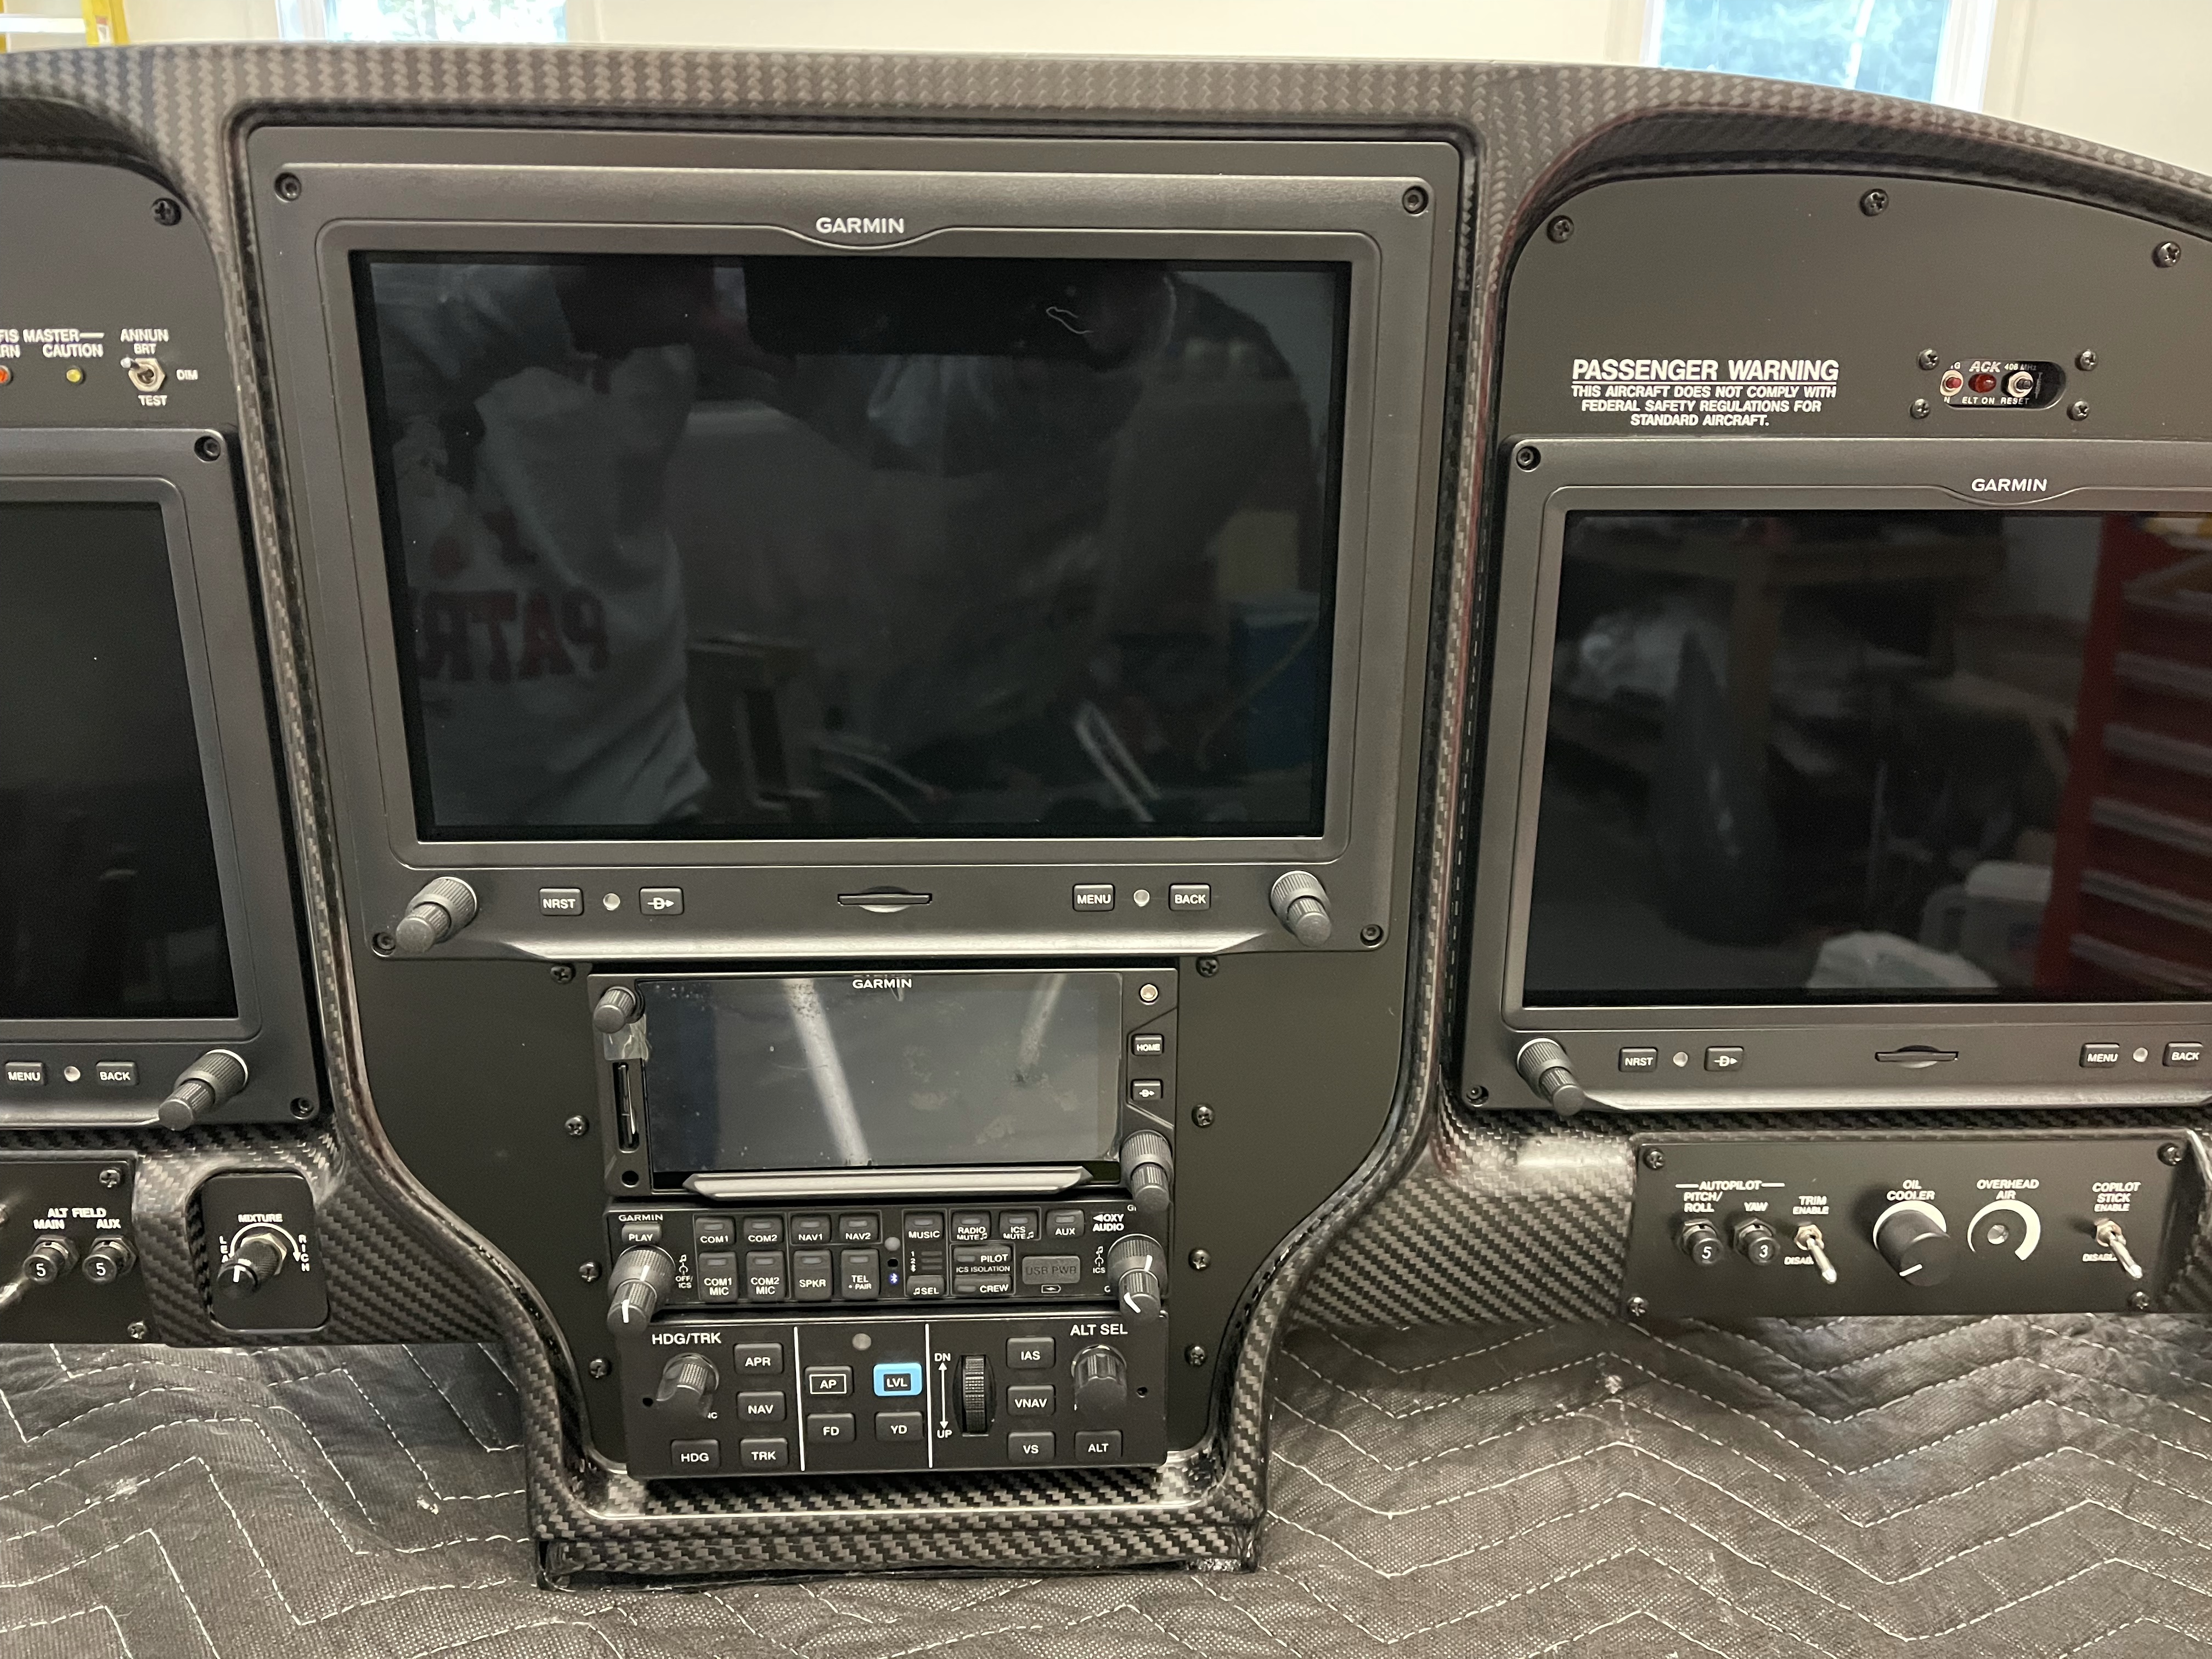
A picture of the panel propped up on my table.

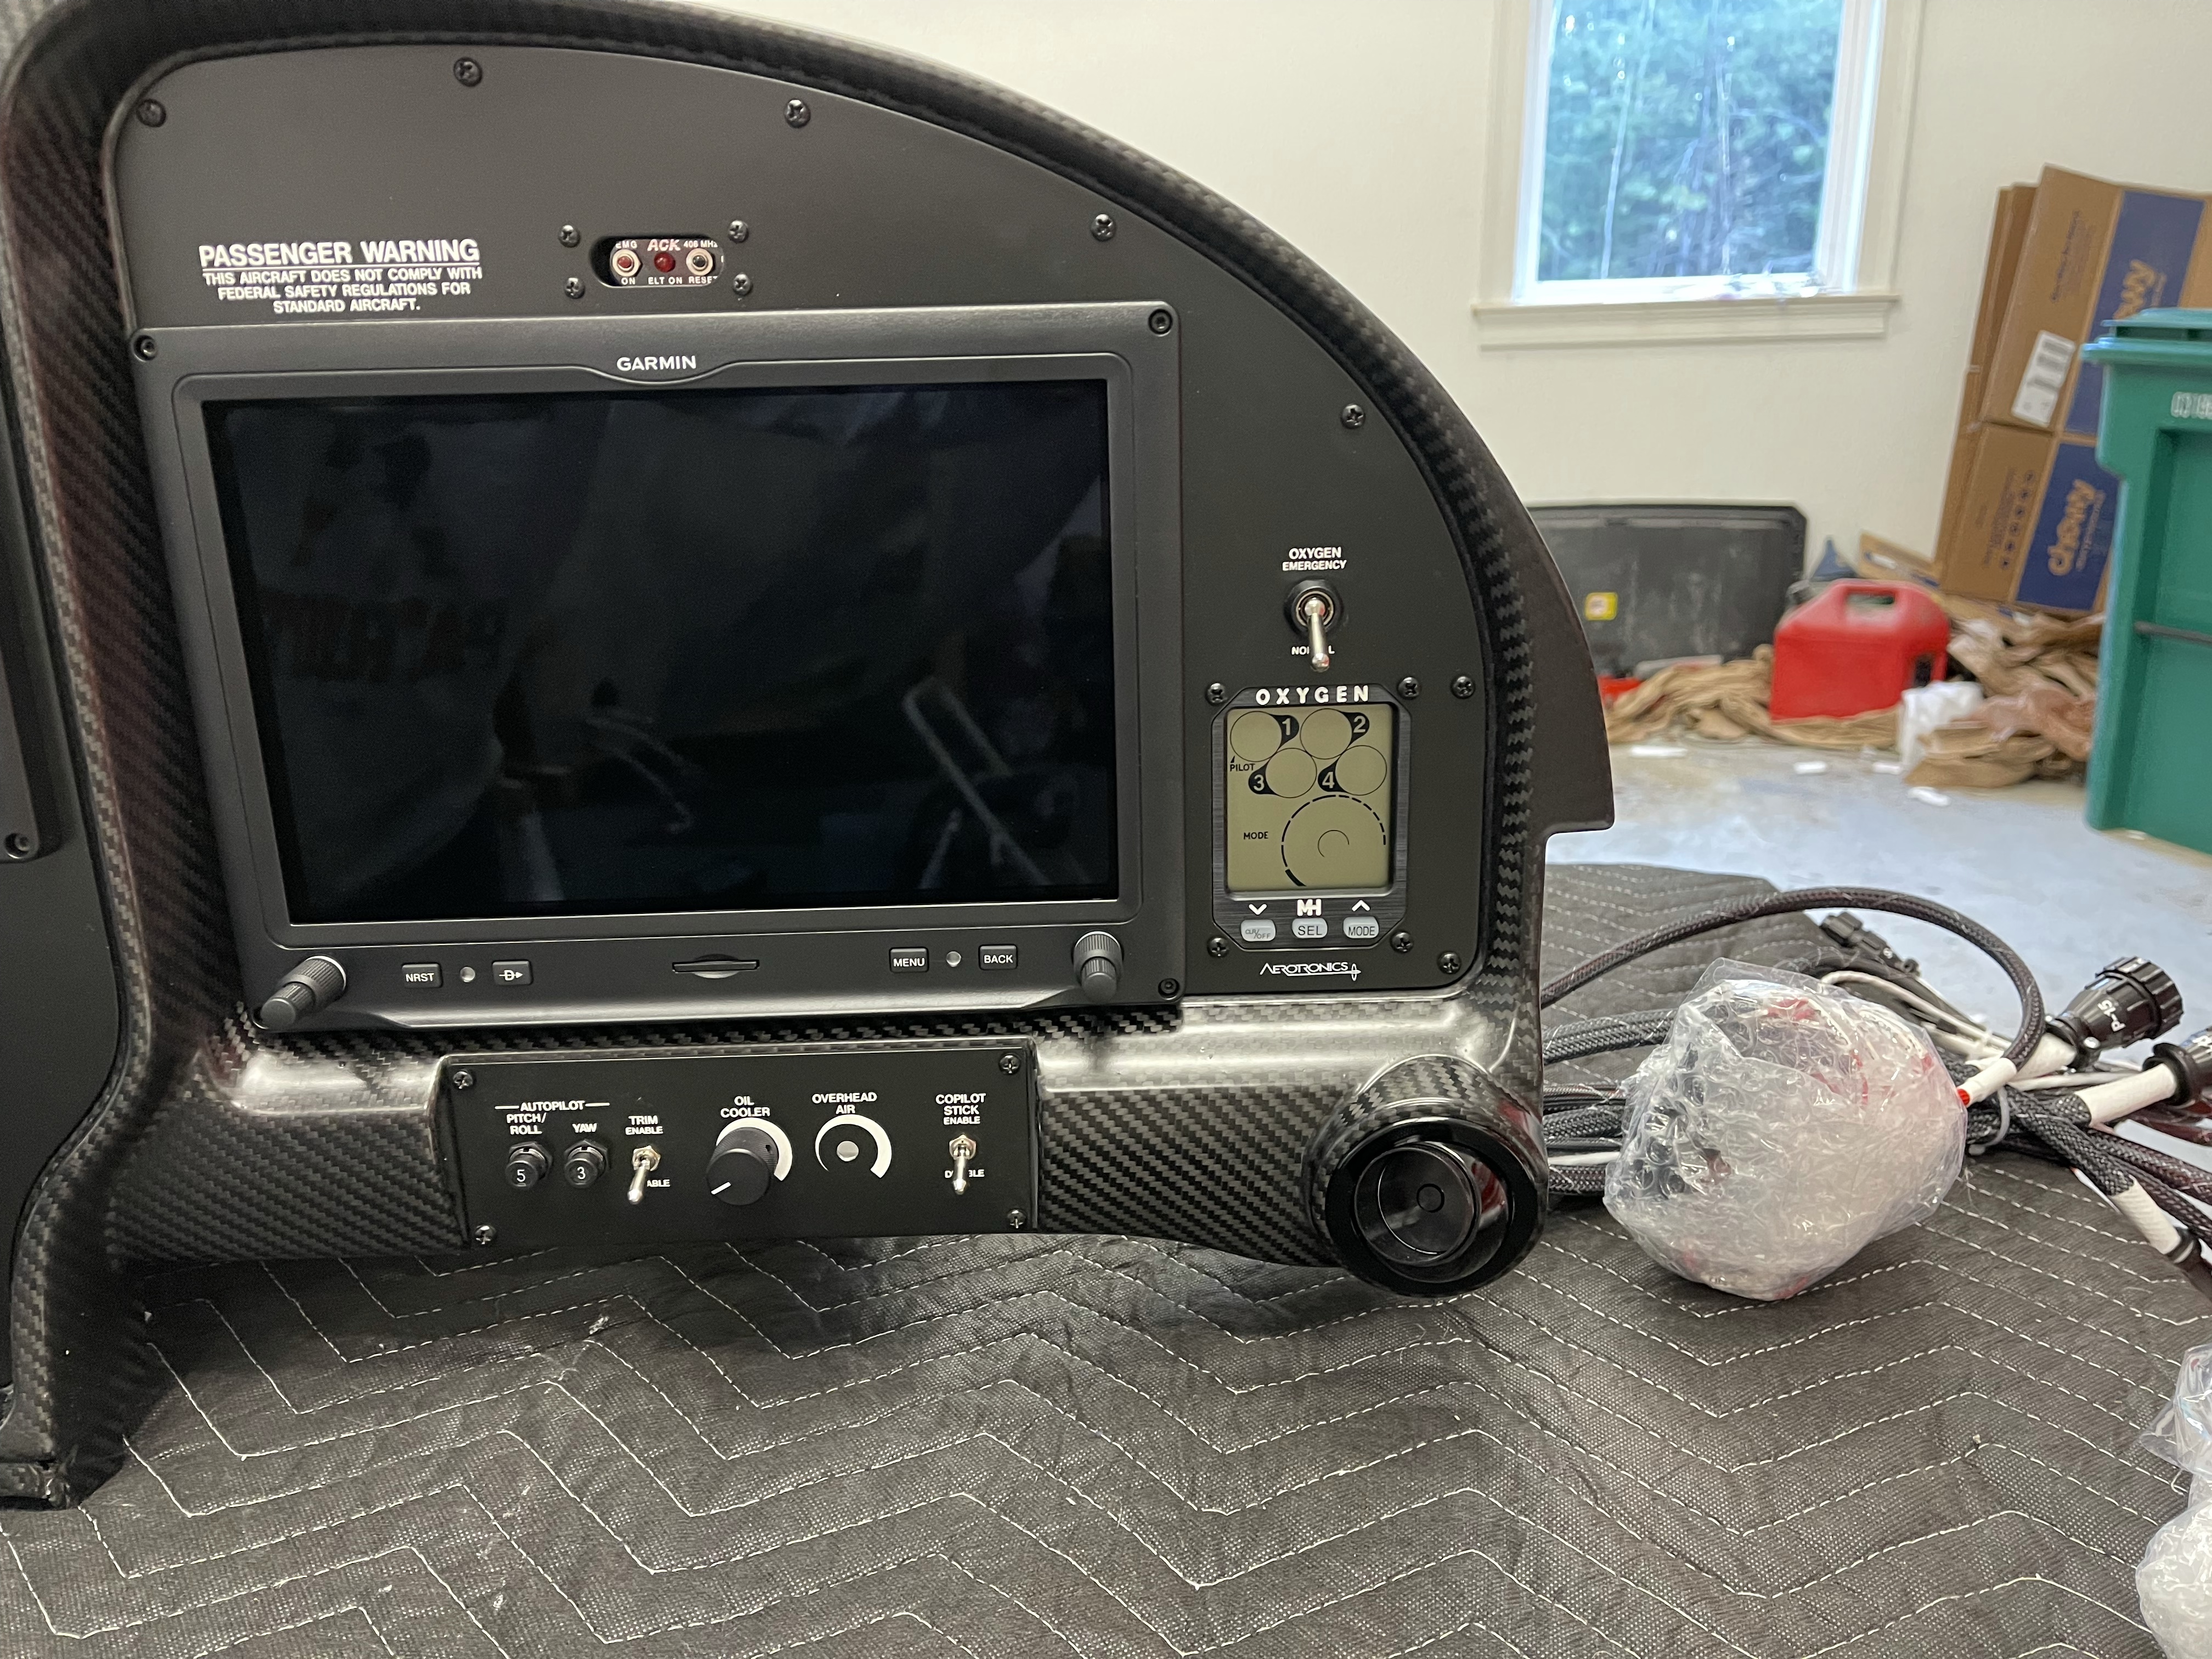
Pictures of the left, center, and right sections closer up.

Aerosport Switch Pod housing lighting controls.

Lower center console housing the SDS EFII controller, defrost, and Air Conditioning controls.

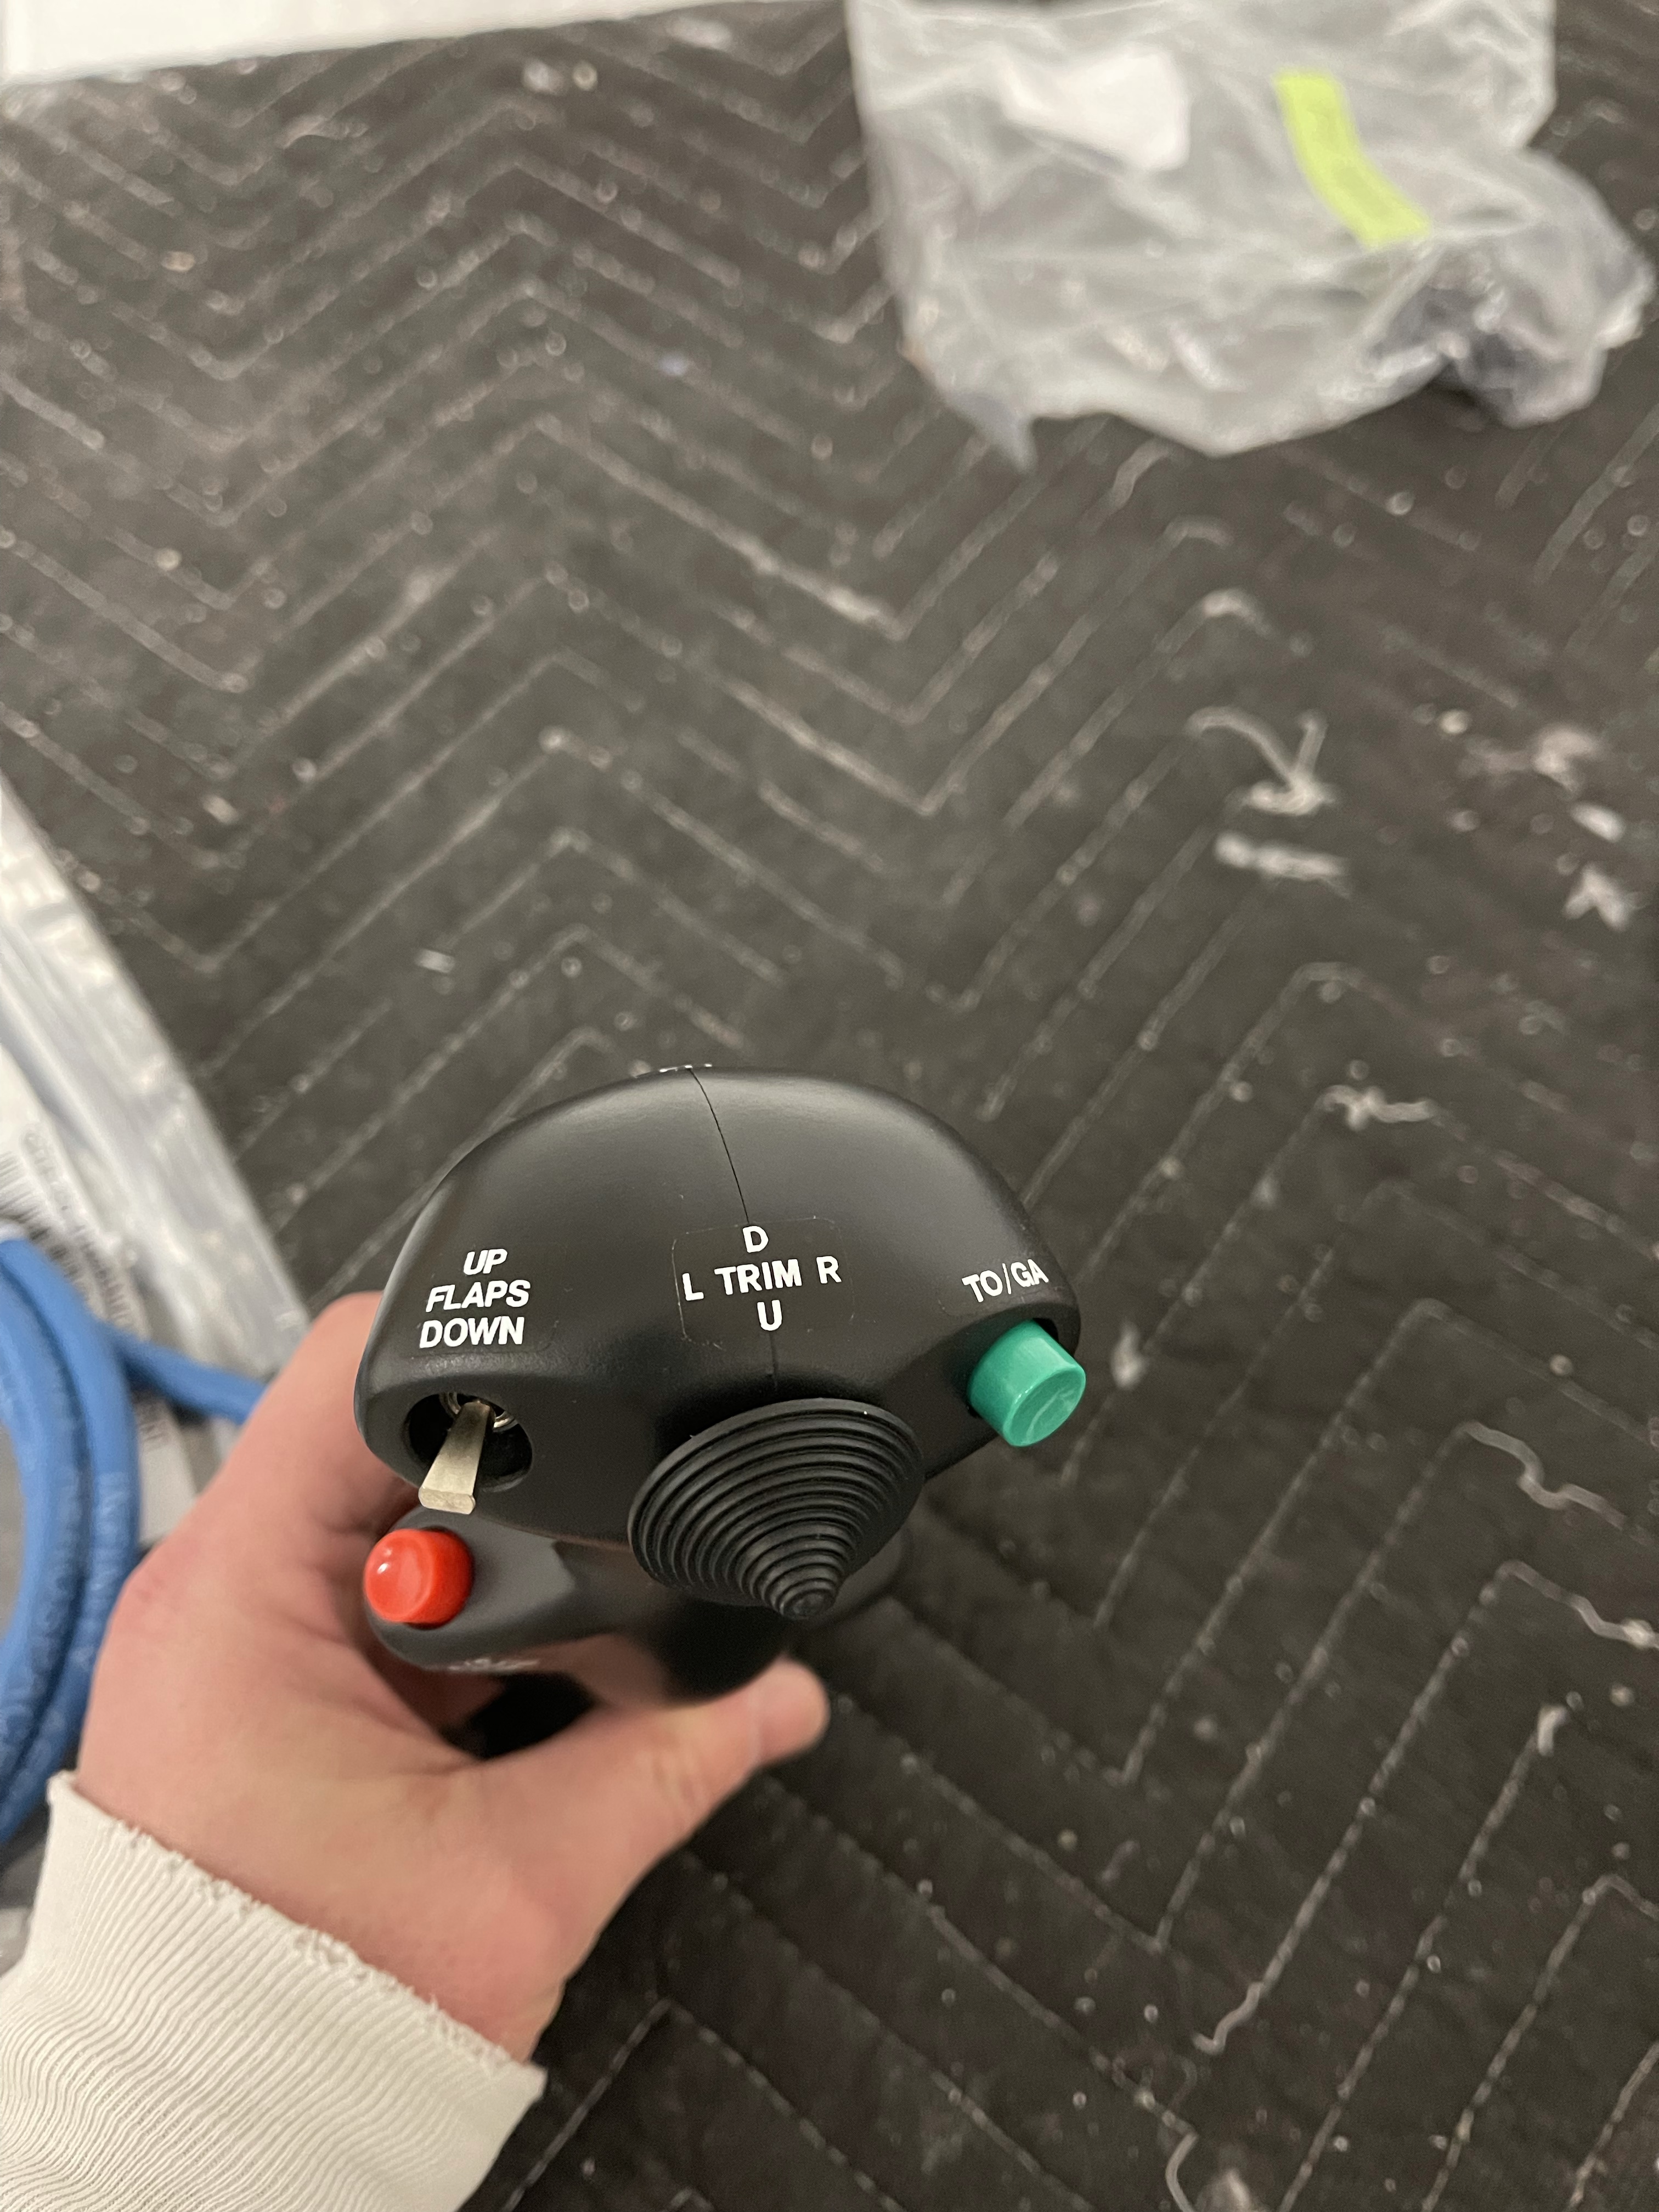
Stick grips came in the package as well all wired up and ready for me to connect. I went with the Infinity HOS (Hands on Stick) Military style grips. Several controls are on the stick that might otherwise be on the panel. The idea here is to have both hands on the controls and throttle during critical phases of flight; not having to move them to activate flaps, for instance.
Here’s a rundown of the button assignment:
- High hat in the center to control roll and pitch trim.
- A switch on the thumb side to control the flaps. This is a momentary down to advance the flaps electronically to the next “notch” and a constant up position so the flaps are raised all the way up.
- Opposite of the flap control, there is a Take off/Go Around button. This will sequence the autopilot/GPS to the missed approach segment when needed.
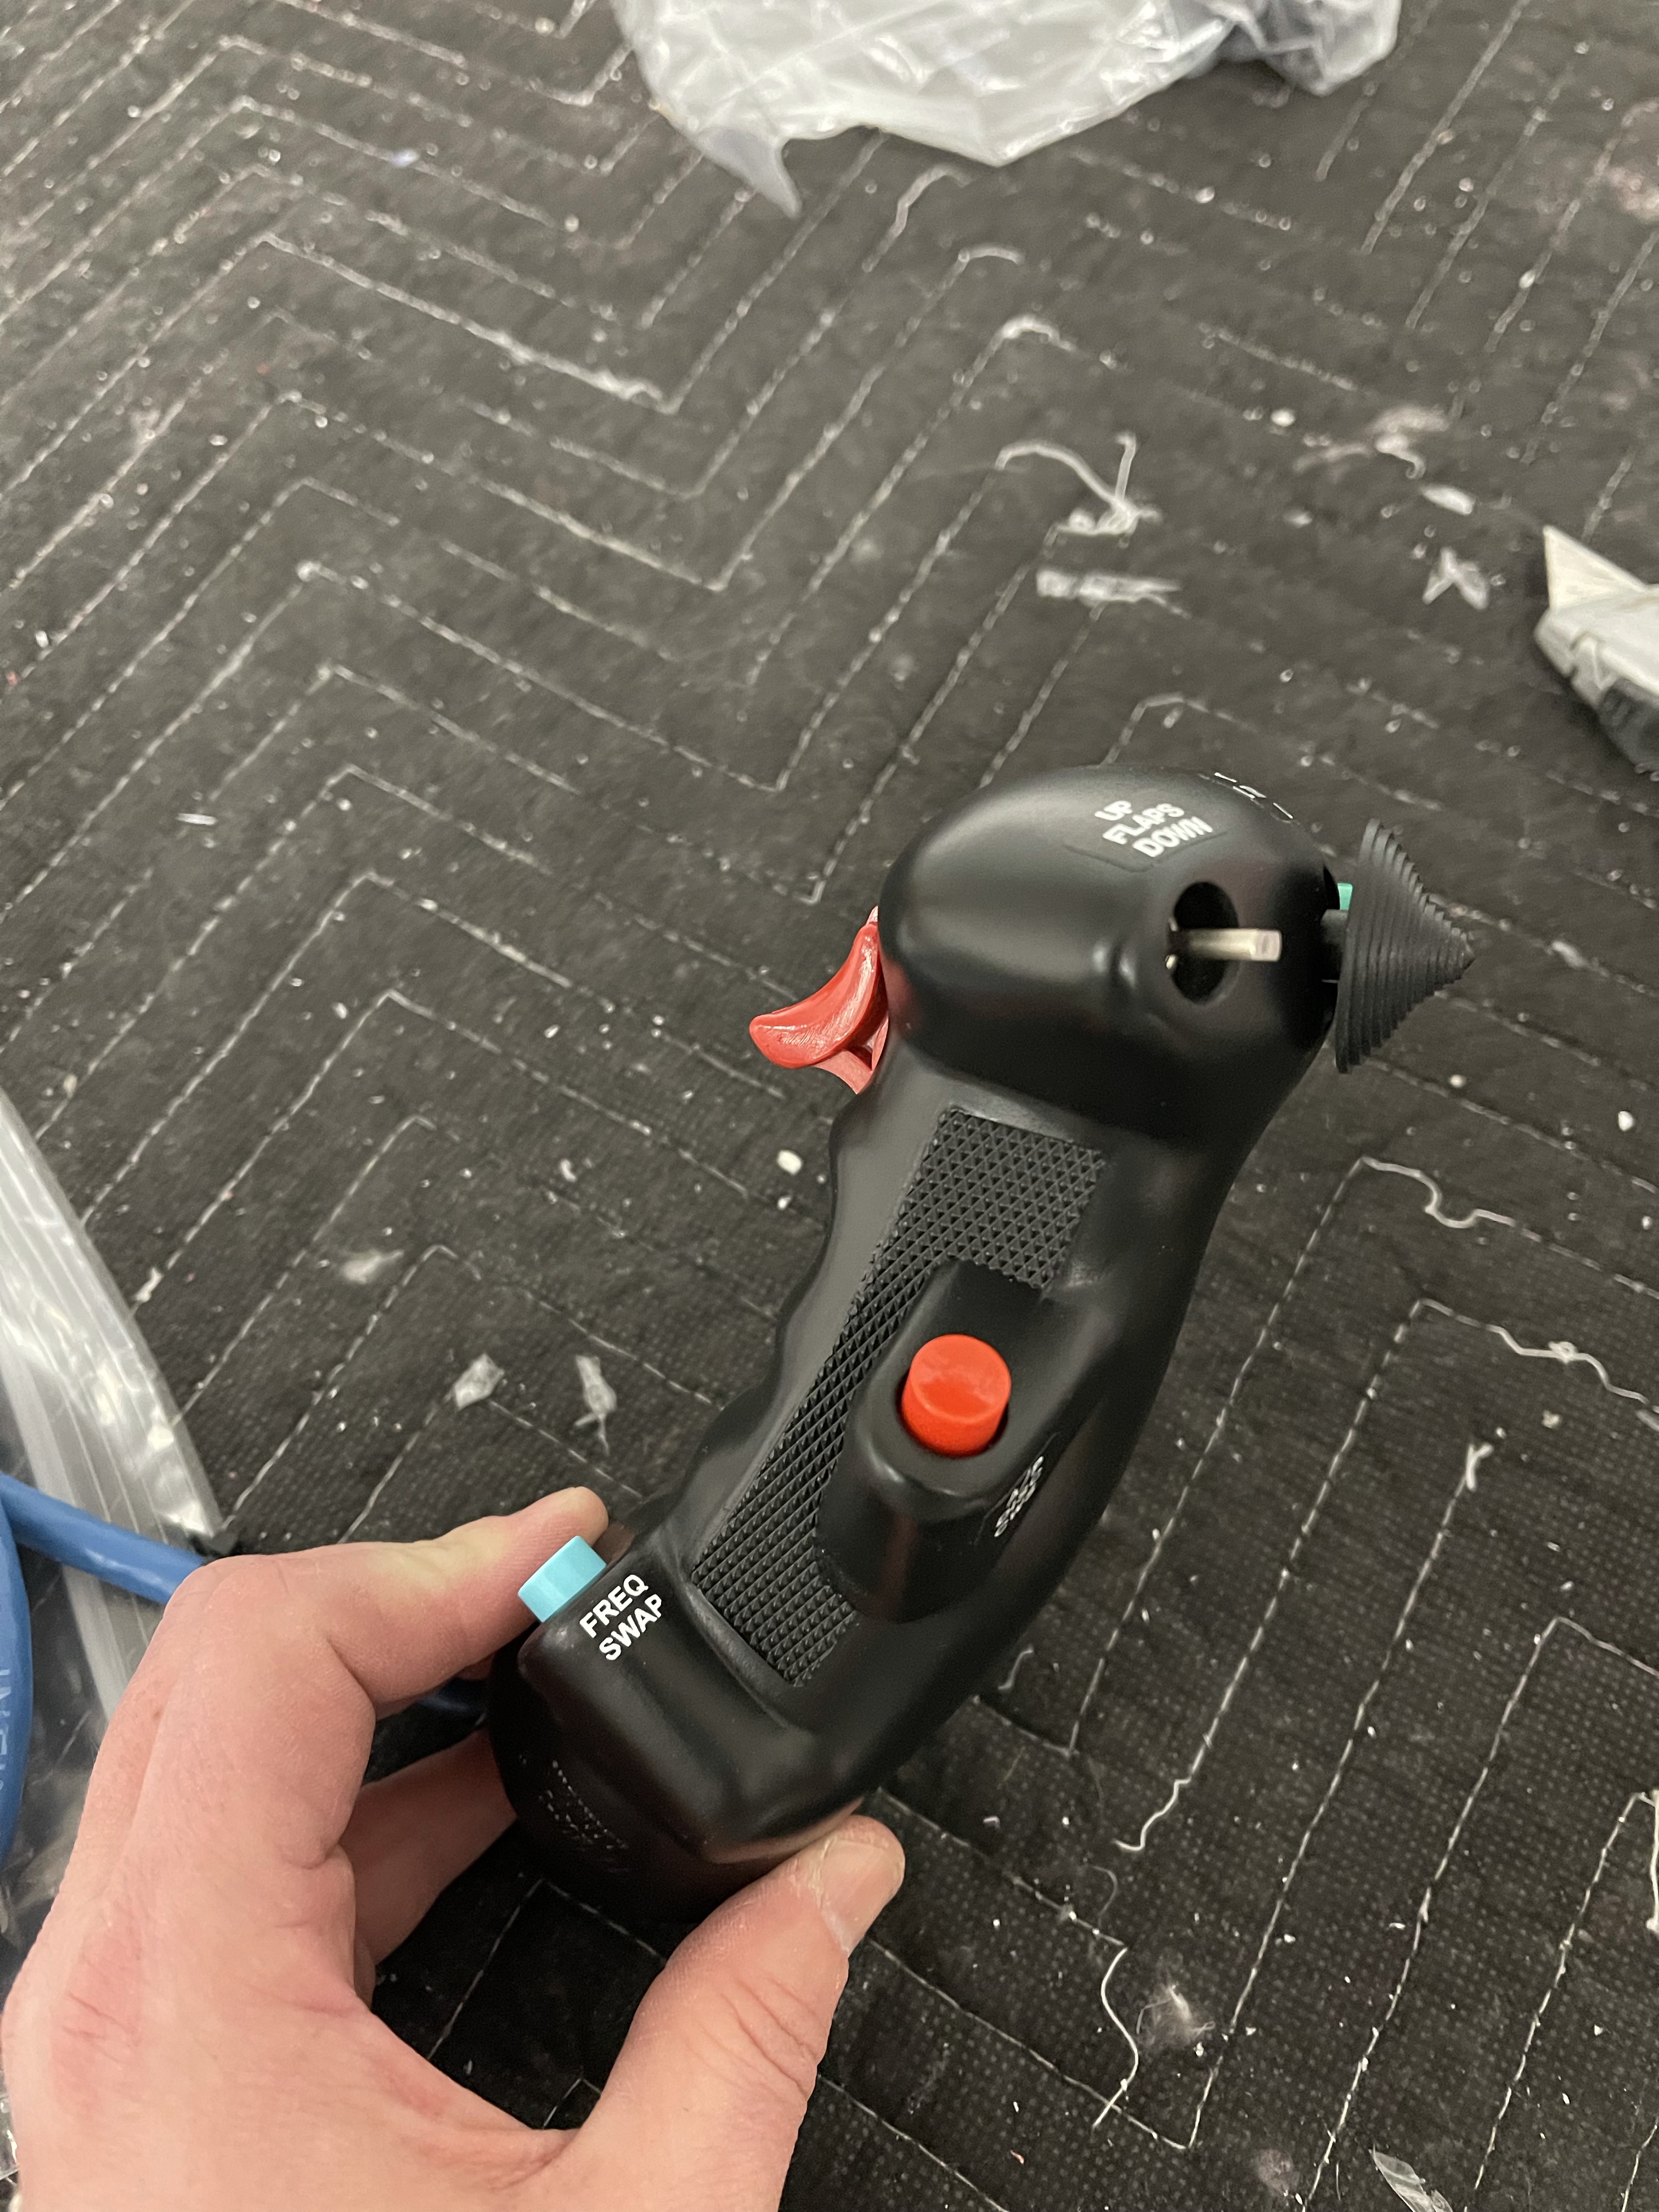
- The Red button on the thumb side is a Auto pilot disconnect/control wheel steering button.
- And finally a frequency flip-flop button. I didn’t really know what to add to this button, but decided on this.. Some people do ident, start button, or other functions. We’ll see how useful this ends up being in practice.. Guess if doing instrument approaches etc.. I may be setting up next frequencies in the standby area ahead of time enough to just have to hit a button with my pinkie to switch when needed.. We’ll see..
And finally some pictures of all the wiring between all the components. Along with several P-Plug connectors on either side of the panel for me to connect to all the other locations in the plane. Aerotronics mounts as many of the sub components right to the panel, as you can see. This alleviates me from having to mount them on my sub panel. Of course all the wiring harnesses are also already all done for me. Including runs out to the wings for AP servos and magnetometer, along with runs to the back for AP servos and trim servos back there. Lots and lots of wiring ahead..


And finally a picture of my panel from Aerotronics all powered up and tested prior to shipment.
They have been really great to work with.

I have the same stick grips with similar functions. I like your labeling on the sticks. Can you tell me what you used to create them.
LikeLike
Not sure if my comment really a question was sent to you. I have the same stick grips with similar functions and would like to label them the way you did. Can you tell me what product? system? labeler? you used to label your stick grips.
LikeLike
Aerotronics actually did it, so I don’t know. I got some black tape for my Dymo Rhino labeler so I could do white text on black tape and it was as white as what came on my grips.
LikeLike
Thank you for the info. I will contact them to see if I can get the labeling. Another question if you don’t mind. What modifications did you have to make to your stick to accommodate the grip and clear the panel? I have mounted the grip as low as possible on stick but understand you have to remove a section from the bottom of the stick. How much? As well as possibly bend radius of the stick.
A comment for you to consider. I was looking through you build picture’s and noticed you installed what I believe is your GA35 antenna on the cabin top with what appears to be a backer plate. Did you verify the size of the ground plane area since it is not attached to aluminum skin? I believe they recommend a least an area of 7.5″ around the antenna to provide a sufficient ground plane for that antenna. Thanks again for the info. Enjoy your build…..
LikeLike
On the stick, I’m still not 100% sure yet. I feel like you have to have the emp on and the elevators hitting the stops before you even know you have a problem. I cut the top of the stick down so that the wire at the bottom of the grip is exactly at the bottom of the straight section. Bending or cutting the bottom I’ll determine once I’m at the airport, but I’m hoping to just bend.
I didn’t really meet the Garmin ground specs per se, but I did run grounding wire from the plate to the center windscreen support bar nuts. The other end is connected to airplane structure.
LikeLike