
I decided quite awhile ago that I wasn’t going to follow the plans for the window install. The main reason is the plans have you bonding the windows in with adhesive and then using fiberglass cloth over the gap between the plexiglass and the fuselage. With all the differing materials expanding and contracting differently, this fiberglass area is prone to cracking, even if done perfectly. I became aware of another process that other builders have been using and is outlined in a 5 part YouTube series here https://www.youtube.com/watch?v=A336SG-fsiI&t=405s . It is used quite extensively in the Glastar/Sportsman series of aircraft and involves using a silicon based Silpruf adhesive. This is the same stuff that is used to hold windows in skyscrapers. Hopefully it’ll be good enough for my lowly RV-10. 🙂
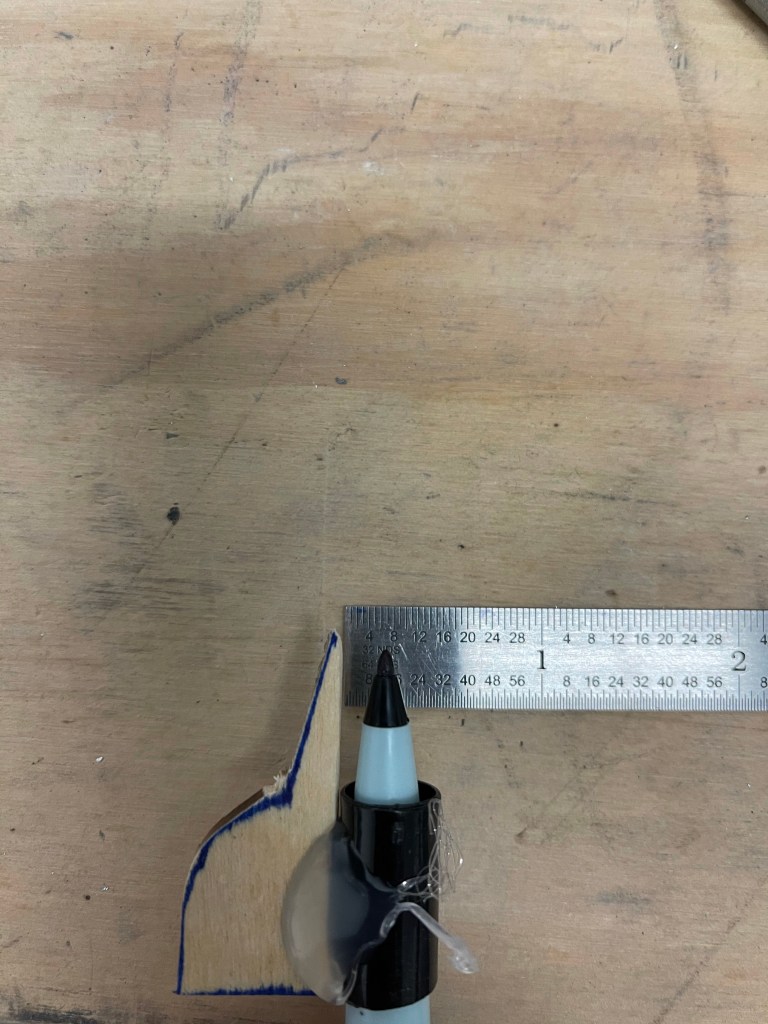
I spent a fair amount of time ordering supplies after watching the videos and taking notes. I began by fabricating a scribe tool from the cap of a wet erase marker. Fortunately my wife had a hot-glue gun, so one less tool to have to buy… 🙂 The idea here is to cut the cap so the pen fits in snug and have the tip of the wooden piece I cut from a popsicle stick be about 3/16″. This tool will be used to follow the indent of the window joggle and the wet erase marker will mark a line 3/16″ away on the window setting the visual gap you will have.
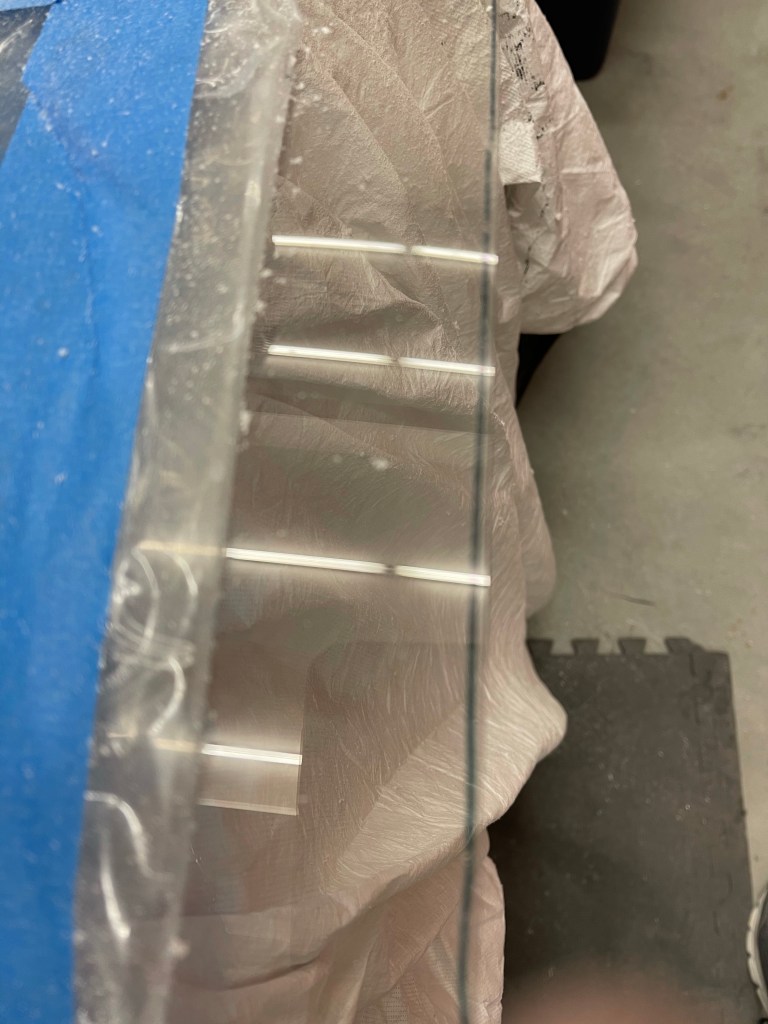
Below you can see the scribe line on one of the rear windows and the angle grinder used to trim the window with sandpaper. It’s helpful to have a white background while doing this to bring out the black line as you’re sanding, so I bought a white blanket and threw a white sheet on the floor.
Probably the hardest time I had was finding the right stuff for the using the angle grinder. I ended up buying a 5″ Phenolic disc from my local auto parts store similar to this: https://www.amazon.com/DEWALT-DW4950-5-Inch-Phenolic-Disc/dp/B00004RHAW. I also bought 5″ circular 80 grit sandpaper with adhesive backing. Then I needed to figure out the adapter I needed to hold the phenolic disc on and be flat. I ended up buying this and it worked great! https://www.amazon.com/gp/product/B000A8NM8O/ref=ppx_yo_dt_b_asin_title_o03_s00?ie=UTF8&psc=1
Below you can see the uniform gap left between the edge of the trimmed window and window joggle.


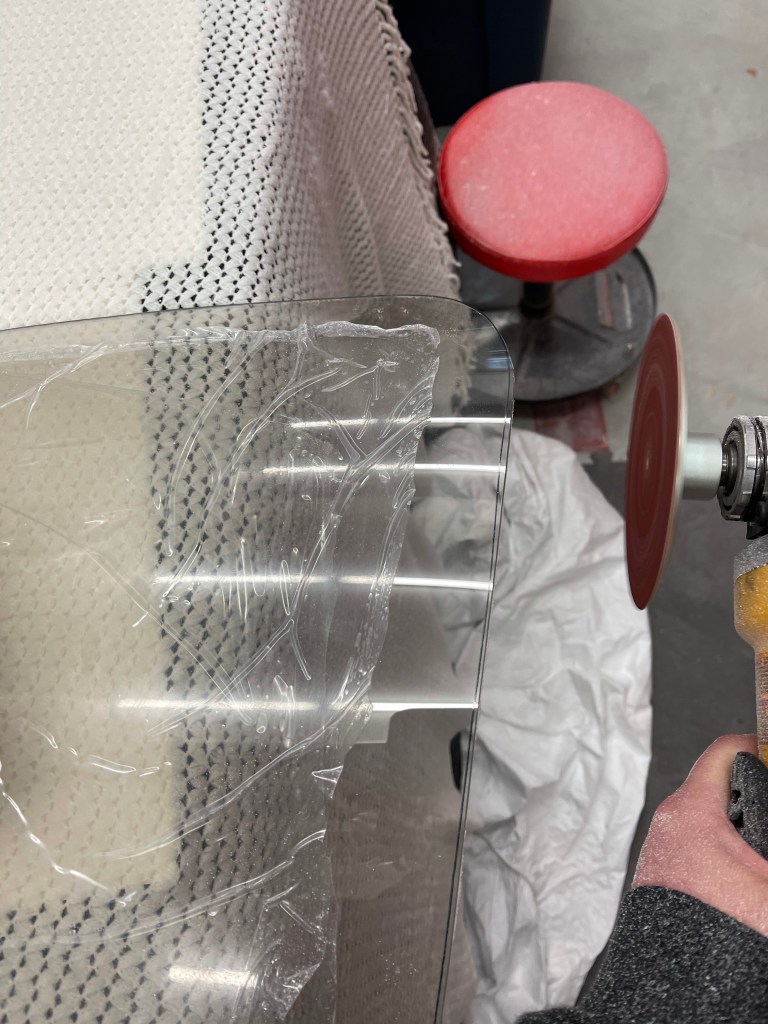
After sanding the edge of the window to get rid of any marks from the sanding process along with putting a radius on the outer edge of the window, #40 holes were drilled along the edges of the window to hold wing-nut clecos with wooden bridges spanning the gap holding the window in place.
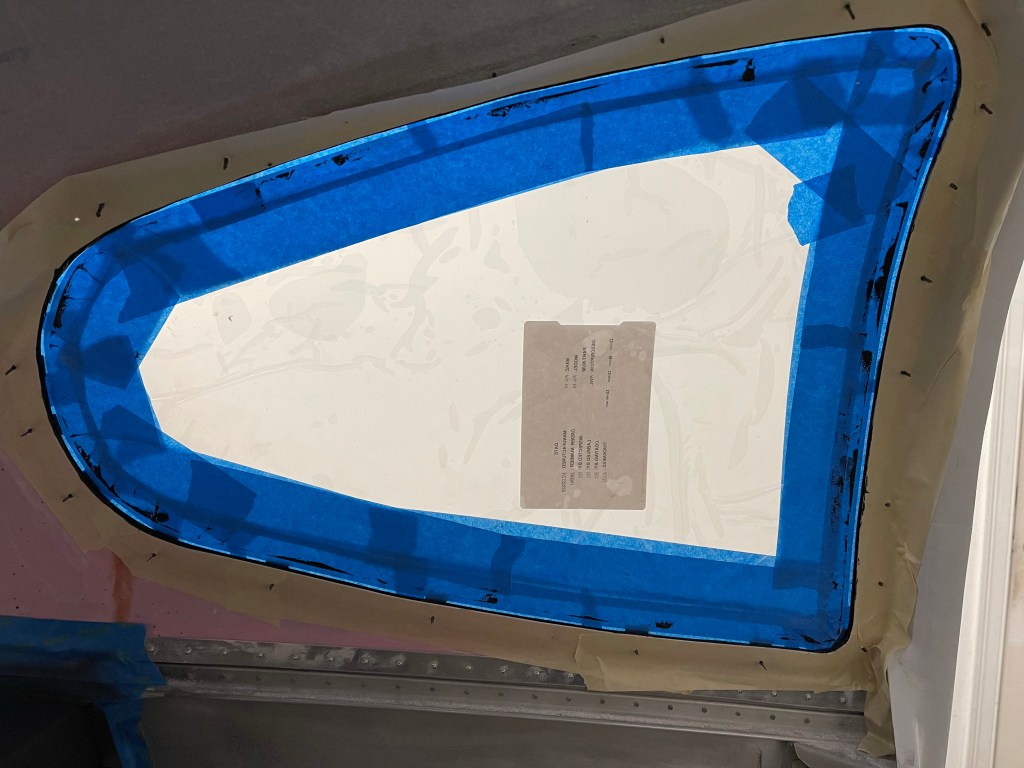
Once that is done, a sharpie is used to mark the outer edge of the window in the joggle. This will later be used as a line to mask to with tape. Additionally, the inside of the window was marked with a wet erase marker along the joggle edge. That line will be used to apply a specific masking tape pattern to the inside of the window.

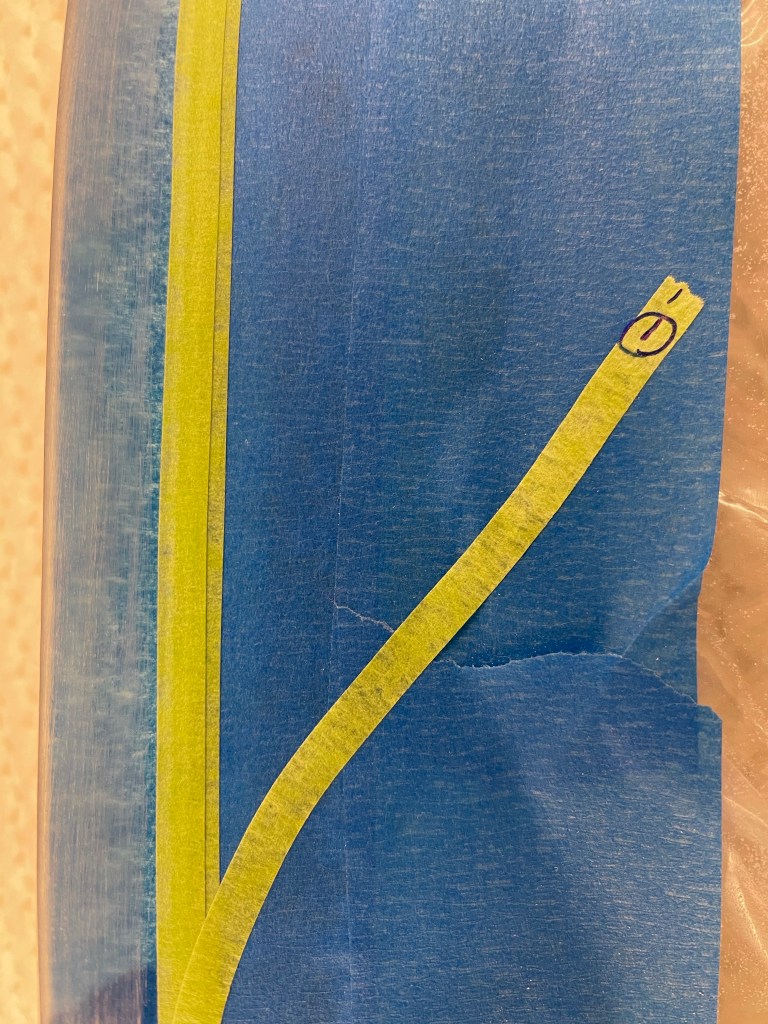
Next up was to mask the inside of the window. This starts with a 1″ blue tape which is kept approx 3/16″ from the line. Then 1/4″ masking tape is used to mask as close to the line as possible without covering the wet-erase line at all. Once satisfied, the line is wiped away with a slightly damp cloth. A second application of 1/4″ tape is applied over the first with an overlap.
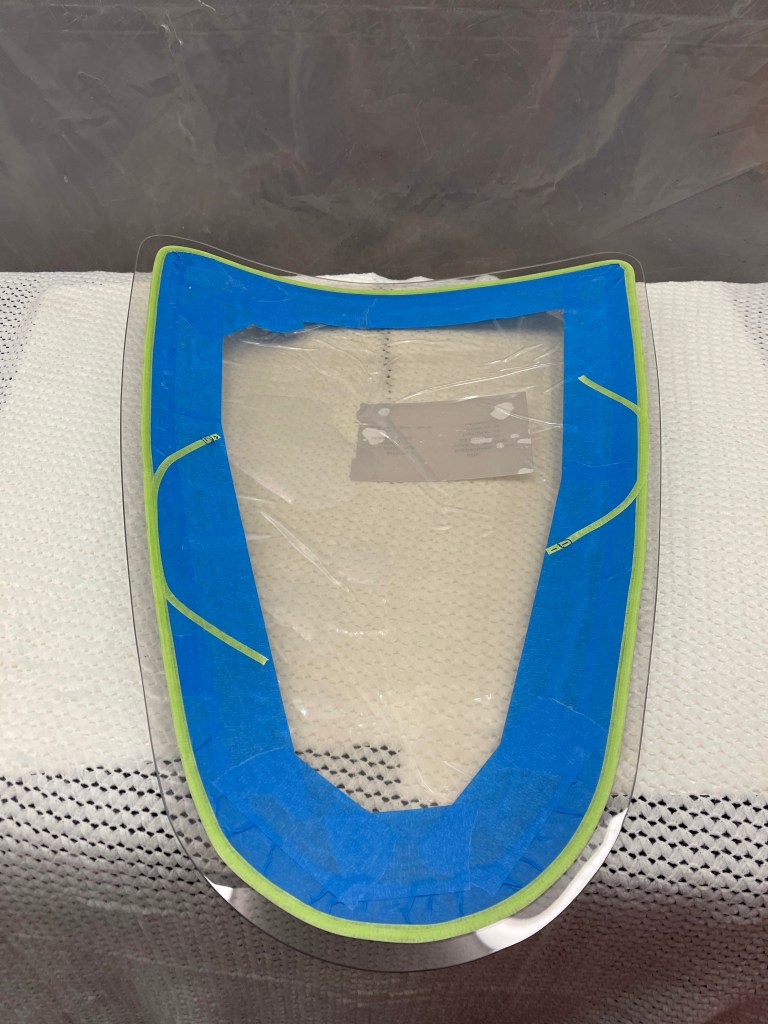
The front edge of the window was covered in 2″ tape and back-cut with a razor blade. Additional tape was added to cover up any exposed glass.
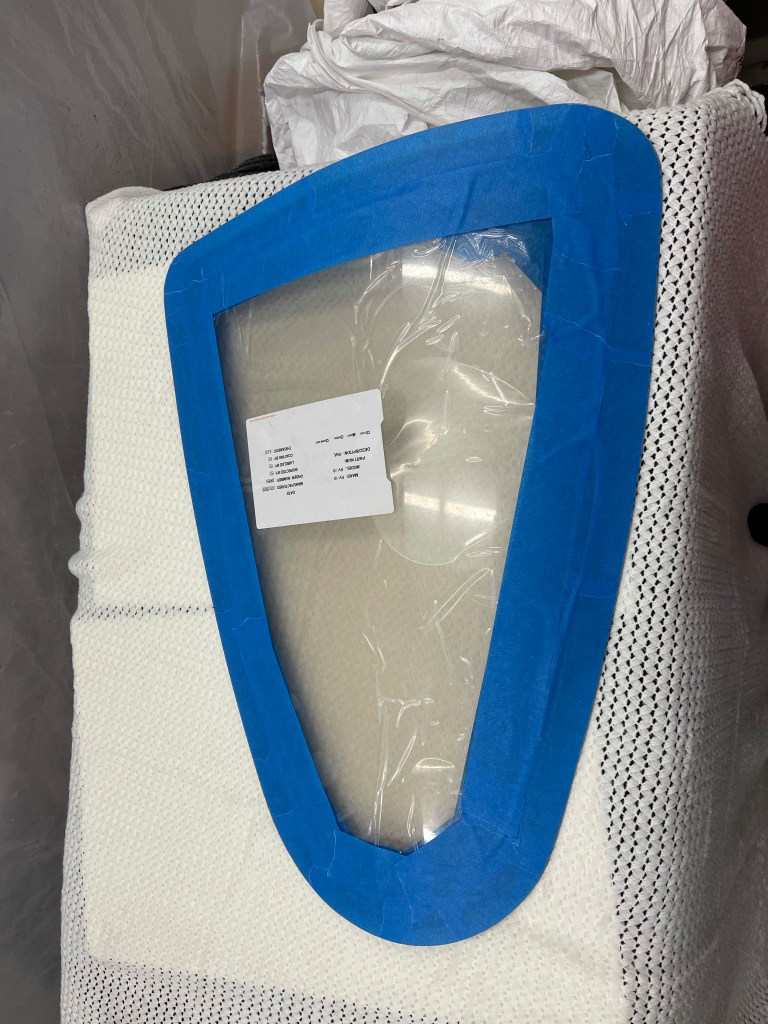

After masking to the line in the window joggle and adding a bunch of extra tape (this is due to the Silpruf being silicone and if it gets on the surface of the plane it can cause fisheyes in the paint. So extra precautions were taken.) I got to placing previously Silpruf standoffs around the perimeter of the window. A few days prior, I had run beads of Silpruf out on some scrap metal and let them cure. I used Permatex ultra black gasket maker to adhere these standoffs to the window joggle. Once those cured, I took the window, put it in place, and progressively trimmed the standoffs down in groups of 3-4 at a time until the window was flush (or as flush as possible) with the fuselage.


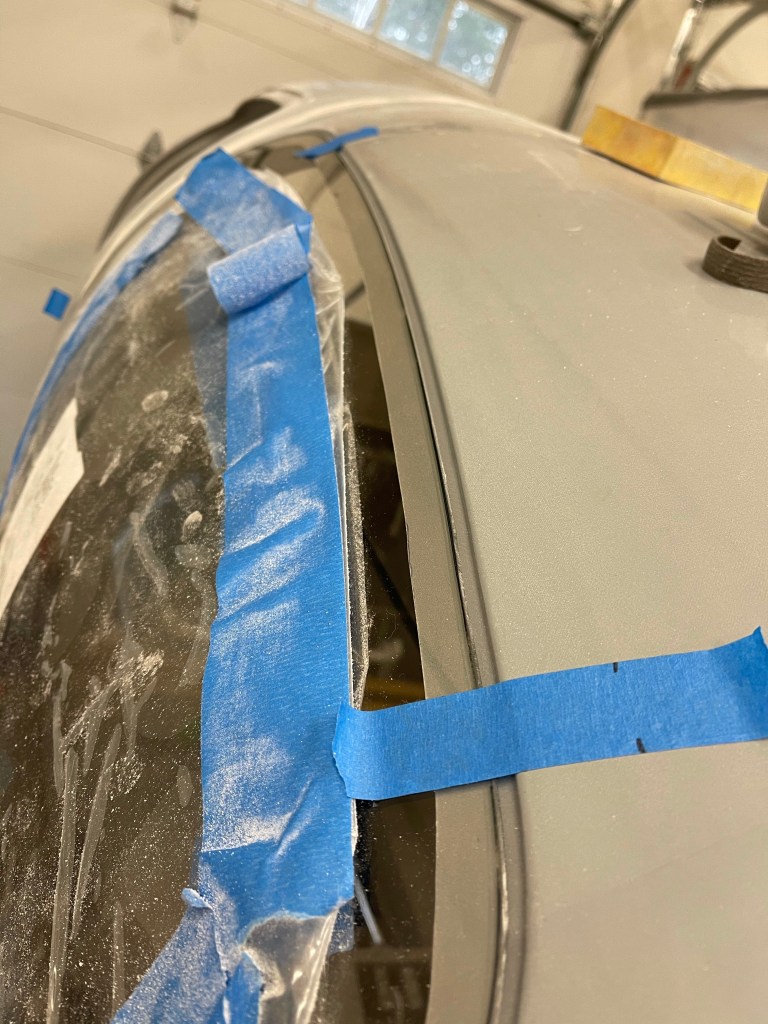
While this picture is after the window is in, it depicts how I used the razor blade to check to flush to fuselage.

Then when you are ready to install the window, you must lay down a bead of Silpruf on the exposed area of the window and spread it out with your finger. This is referred to as the boundary layer. The first 1/4″ tape is pulled leaving the second 1/4″ tapes edge clean and a small gap between this boundary layer and the tape. This must be done 12-24 hours ahead of actually installing the window so it has some time to partially cure.


Then after 12-24 hours have elapsed, you spread a small amount of Silpruf to fill in that gap left. Put a generous bead of Silpruf on the window joggle so it’ll cover the entire width of the joggle with some squeeze out. The window is then put into position, cleaning of the squeeze out is done with an approx 1″ wide squeegee and clecos are inserted all around. Additional cleanup is done between the clecos. Then the tape around the perimeter of the window that was placed to the previously marked line was removed. Each cleco was taken out and the wooden bridge was flipped to avoid getting any Silpruf on the fuselage part of the airplane. There is some additional work to spread out the squeeze out on the inside of the window, culminating with the removal of that last 1/4″ tape. Below is a picture after the left rear window was completed. It’ll now sit for several days, of which I kept the garage heat on for the first 2 days.

Seeing I only really have enough clecos for 1 window at a time (and maybe I’m going a bit overboard with the 30-ish clecos I do have) I really want to have a good bond for these things, so it’s worth the extra few days of waiting for one window to cure prior to installing the next one. In the meantime, I’m trimming and getting the front windows ready for install.


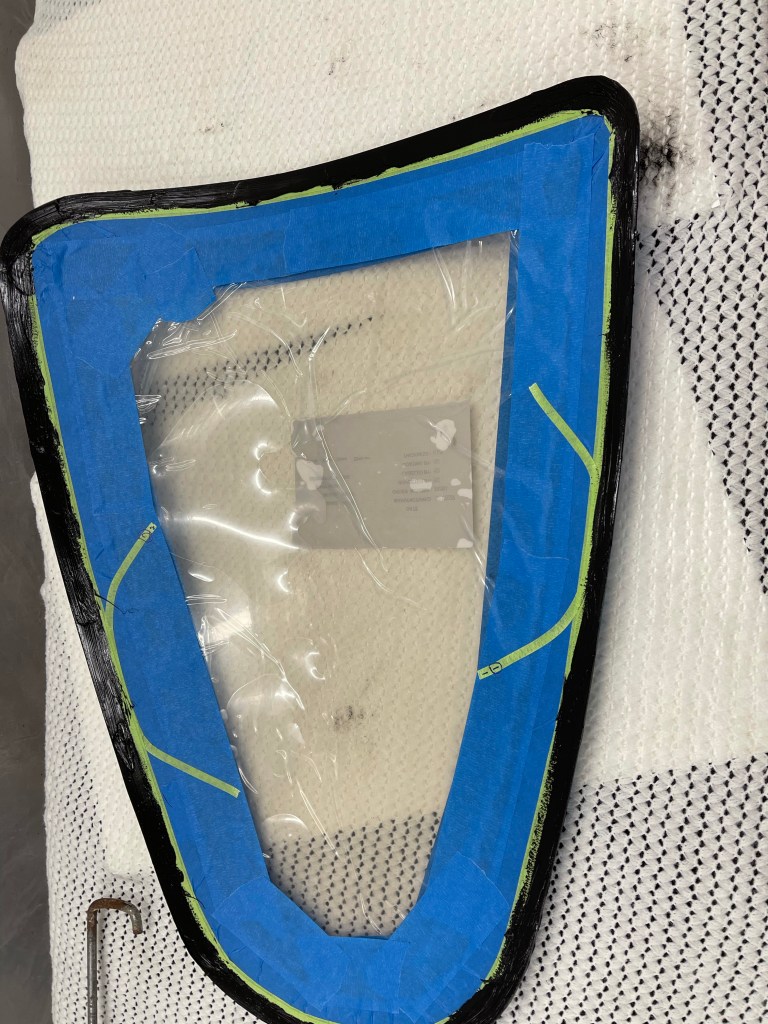
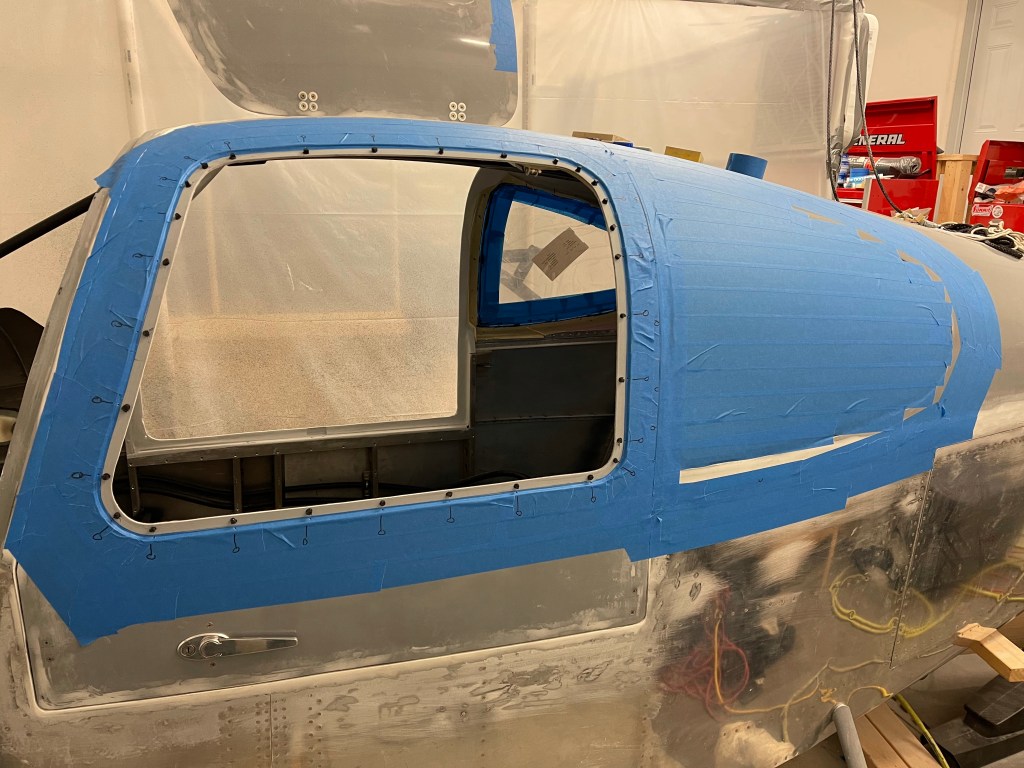
Based on my schedule, I left the first window cure for 5 days prior to removing the clecos and moving on to installing the right rear window. Here you can see the finished results, which are a very nice black line around the permitter of the window, which is ascetically pleasing. After paint, the gap will be filled in with Silpruf forming the final look, but that is still quite a ways away.


Below you can see the right rear window is now installed and curing.

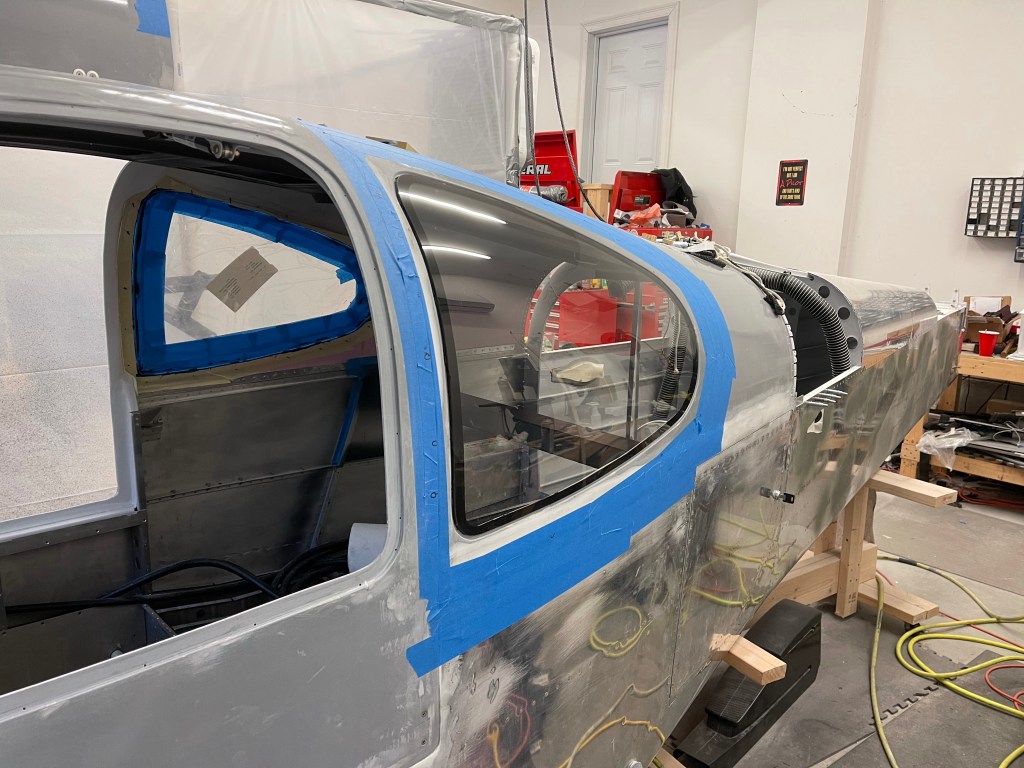
In the meantime, I’ve managed to get the front left door window all prepped and masked off. The Joggle is masked and standoffs are in place and trimmed. All that’s left is to install the window once I’m comfortable removing the clecos from the rear right window once it’s fully cured.
This process will be repeated for the front door windows, then it’ll be onto the windscreen, which is going to be part this process and part laying up a fiberglass base. More on that as I get to it.

So no trim ring? Only the silicon based Silpruf adhesive holding the window in place, interesting process.
LikeLike
There will be a ring of black Silpruf in the gap after paint.
LikeLike