Paint!

Just before Memorial Day, Evoke let me know that the plane was ready to be picked up! Initially, the plan was for the Friday before, however, that was pushed to Memorial Day itself due to wanting the sealant to cure over the weekend.

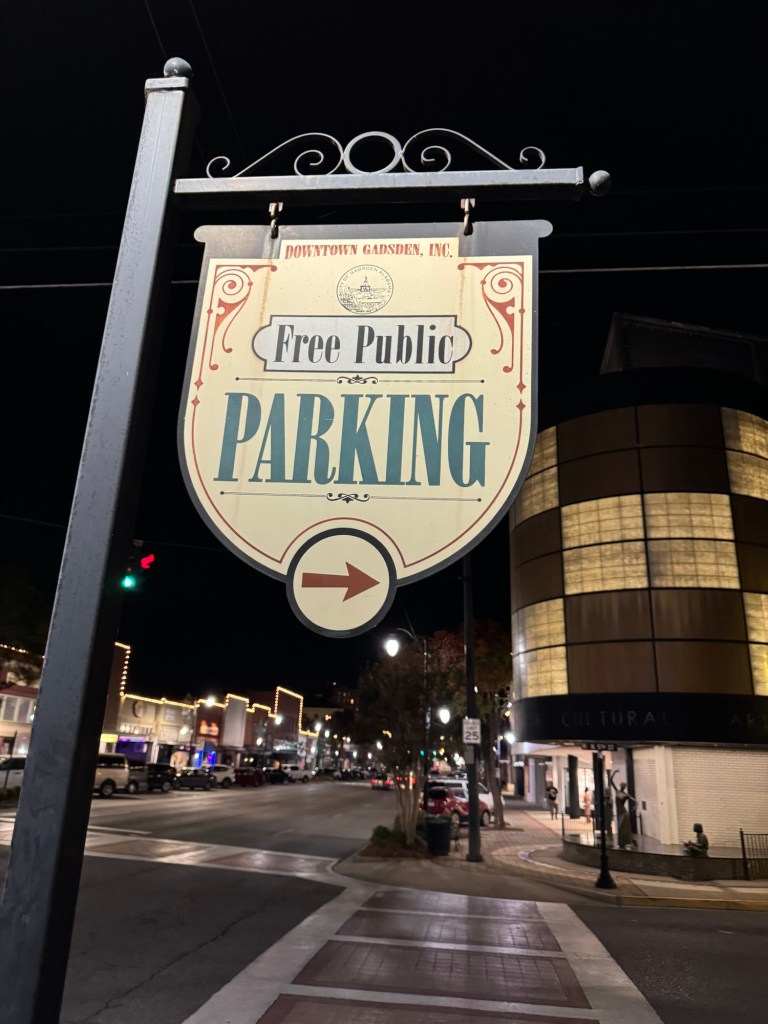
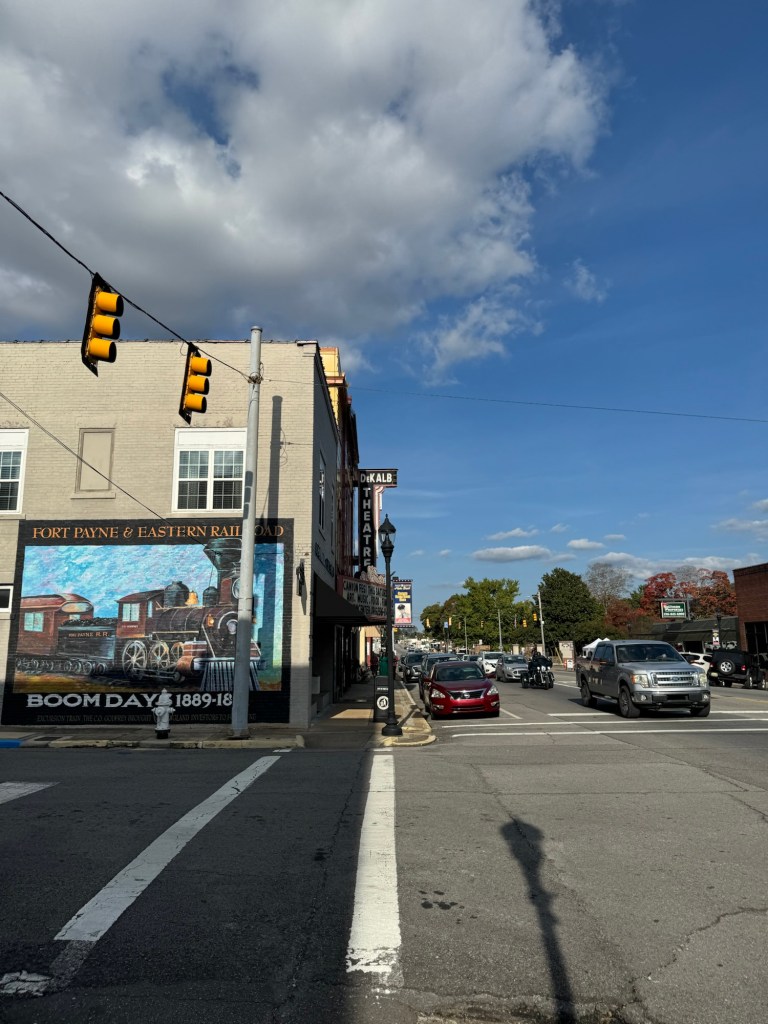
I purchased tickets to fly commercially down to Atlanta on Sunday, and then rented a one way car from Atlanta to Gadsden. I checked into the Hotel, went to dinner downtown.. and waited for Monday morning to come for the big reveal.

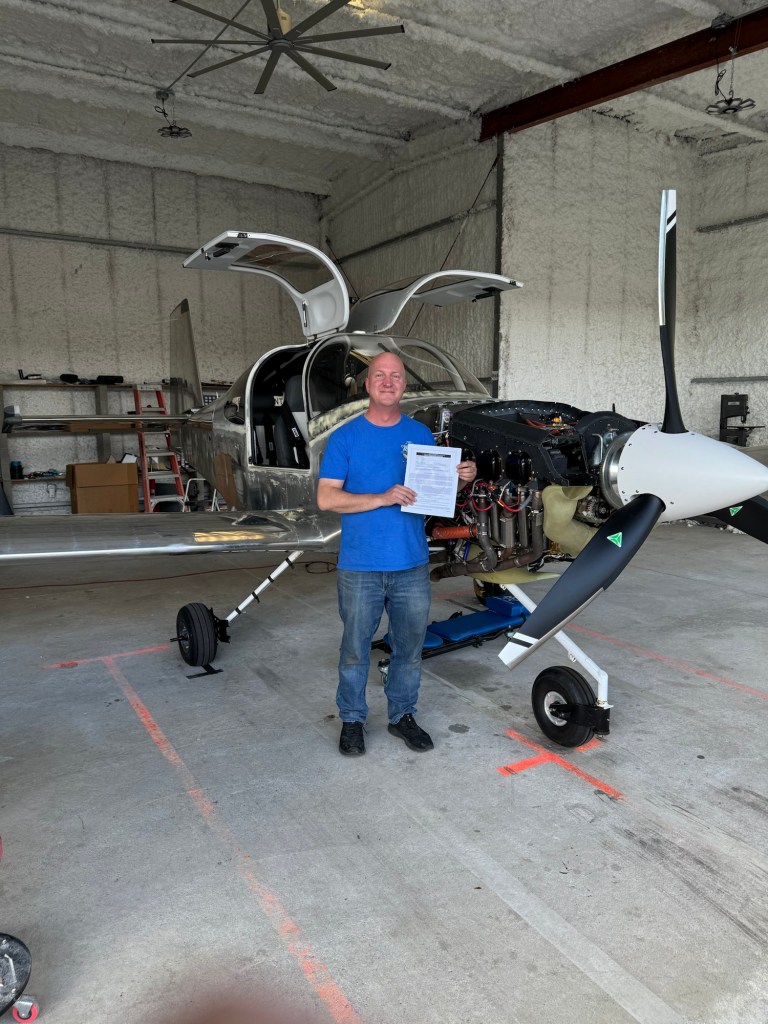
Monday morning, I arrived shortly after 9am and was greeted by the team. Some with cameras and video rolling, others working on buffing the spinner. As Jonathan says, we don’t stop working on it until it leaves. I sort of felt bad, it being Memorial Day and all, however, several members of the Evoke team were there that day.

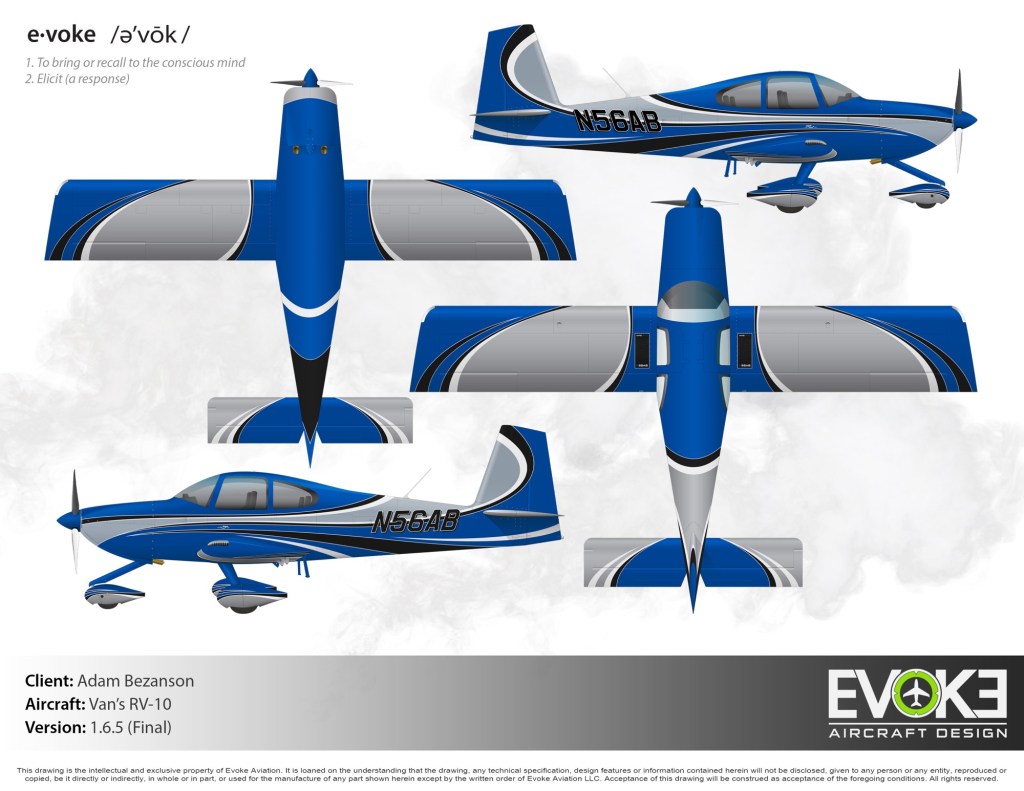
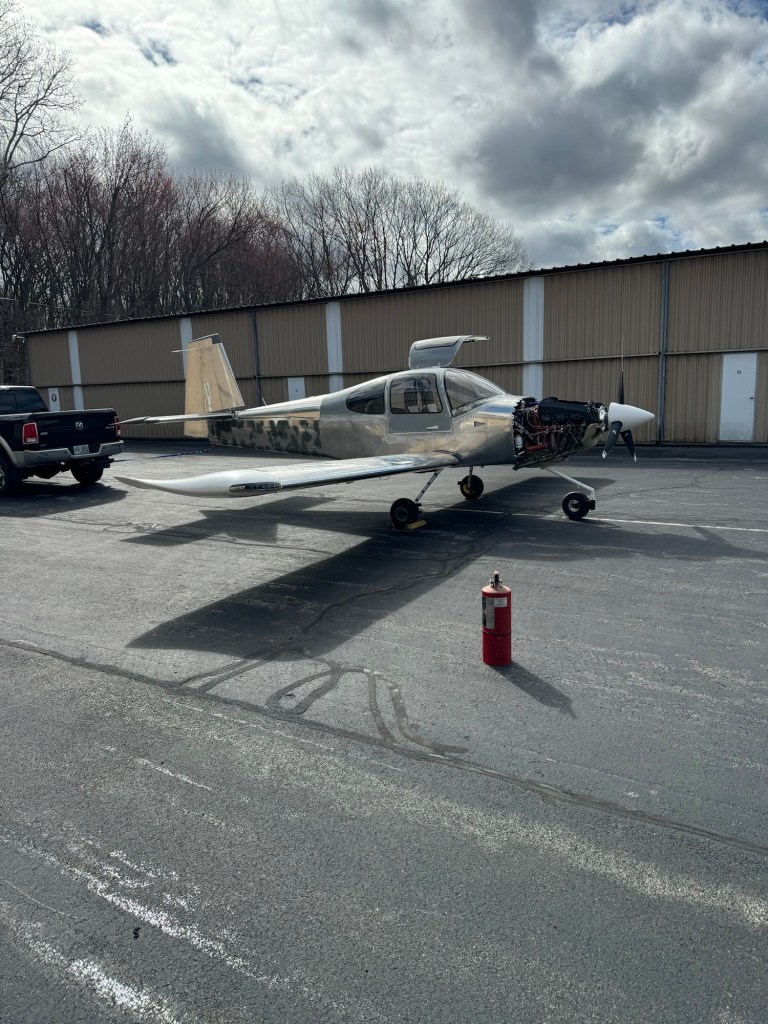
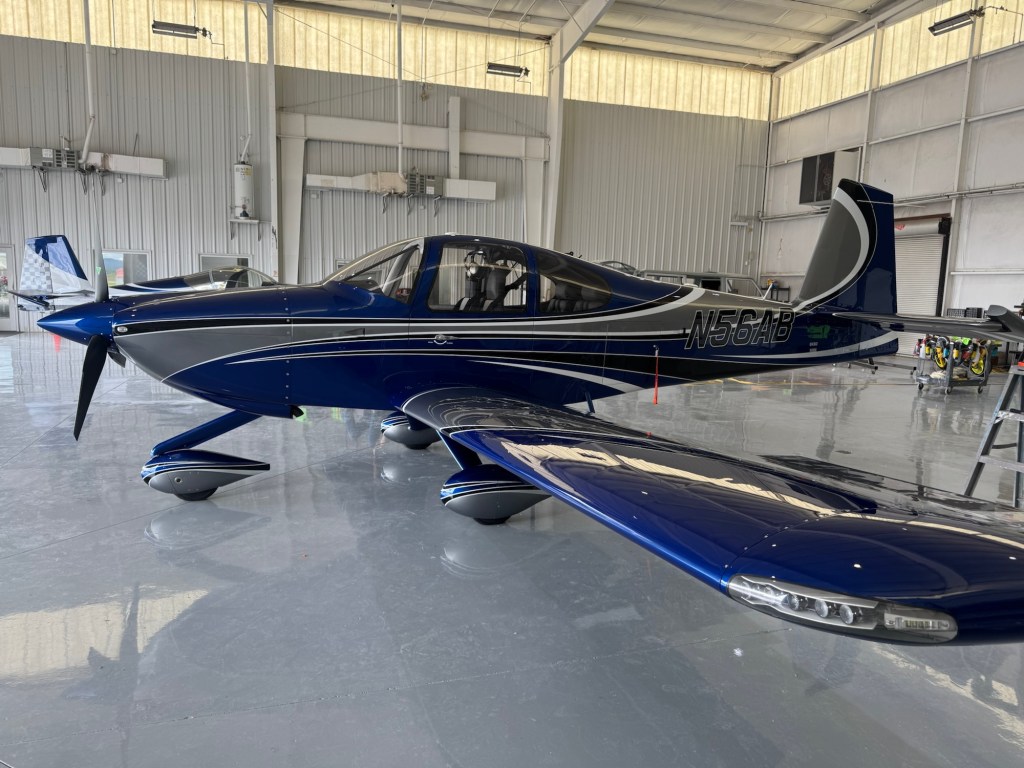
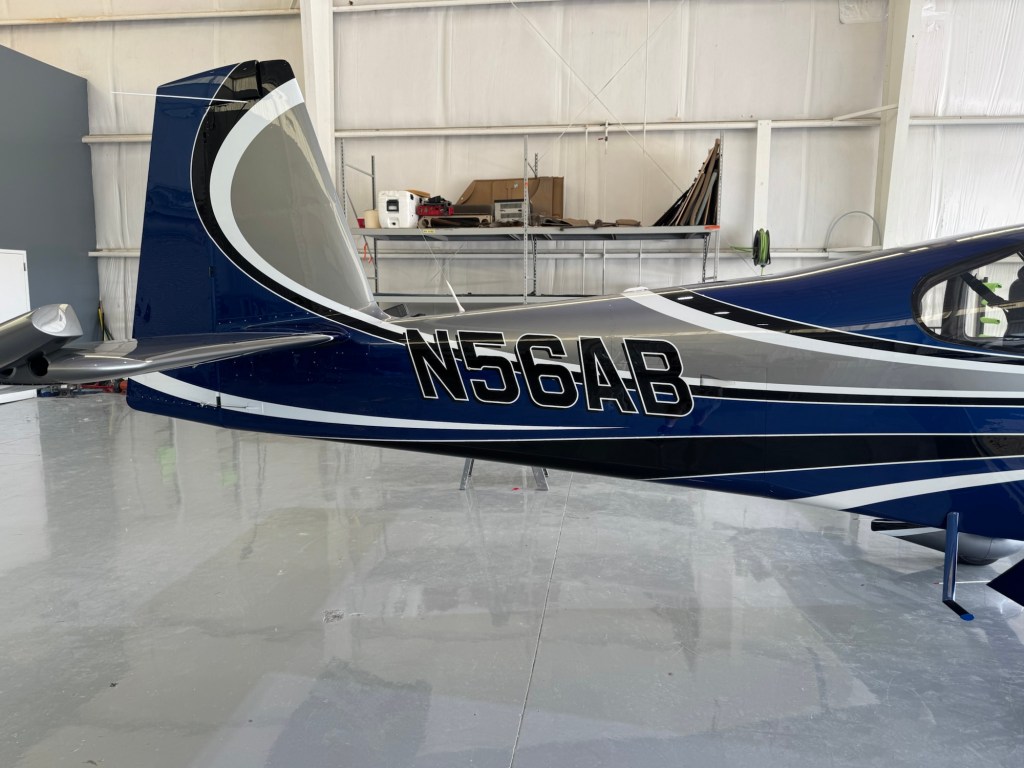
I was in awe of the finished product. It was simply perfect. Lots of areas that I left passable, but rough, were now perfect. Very happy with the color choices and how the blue came out.

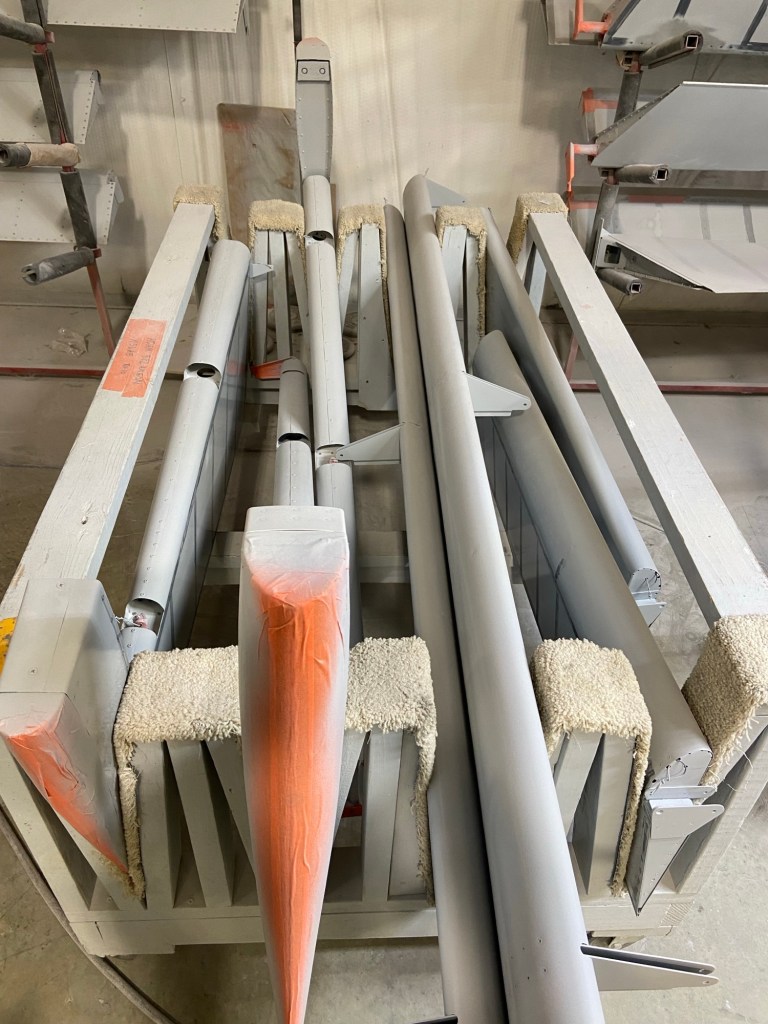
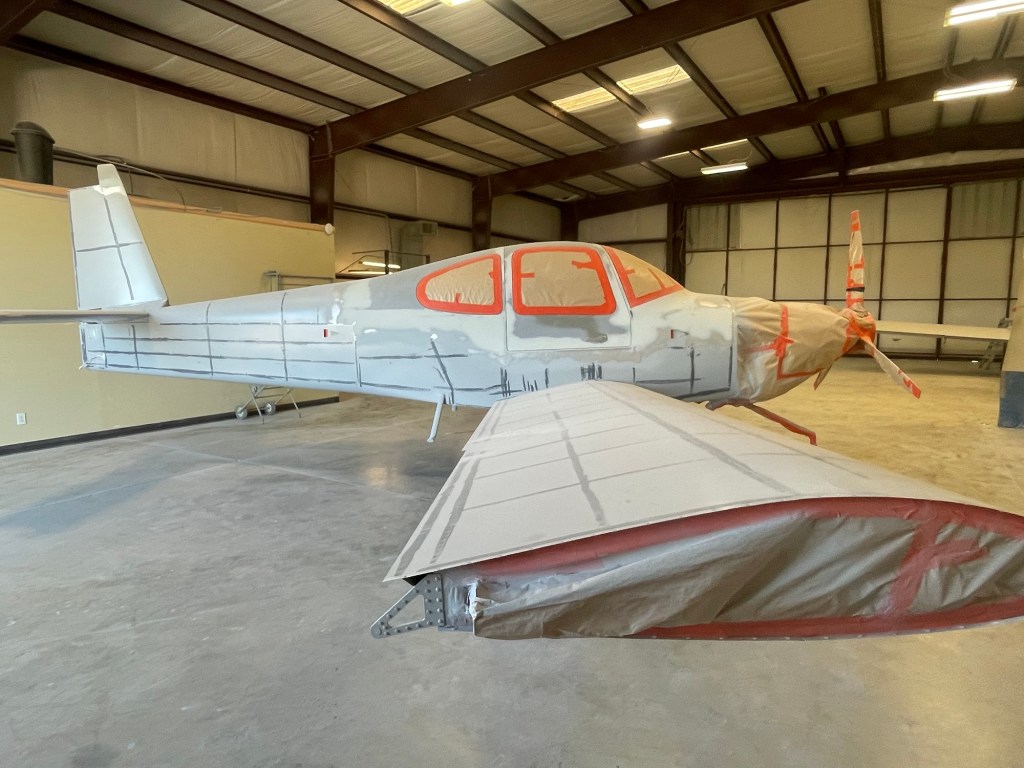
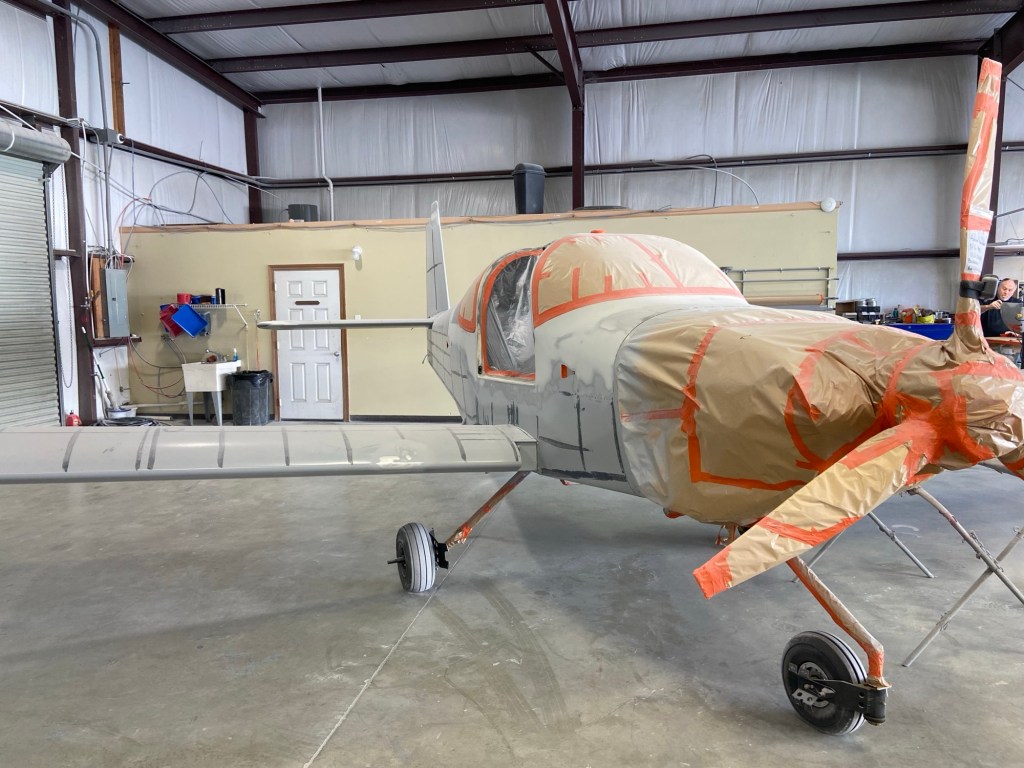
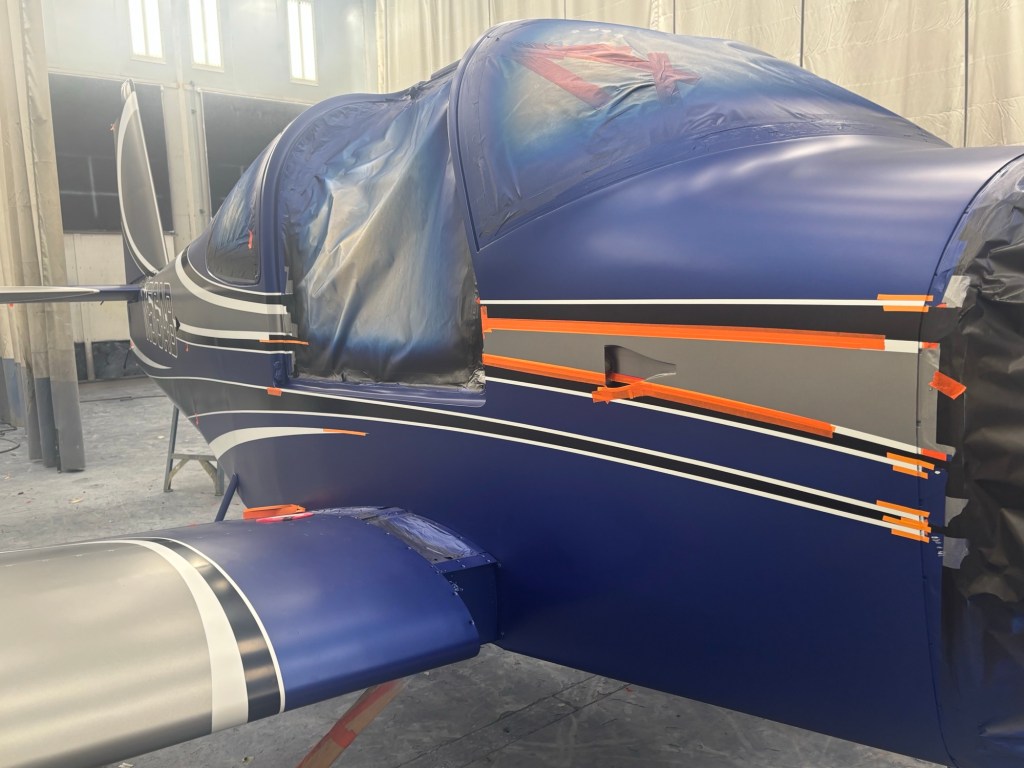
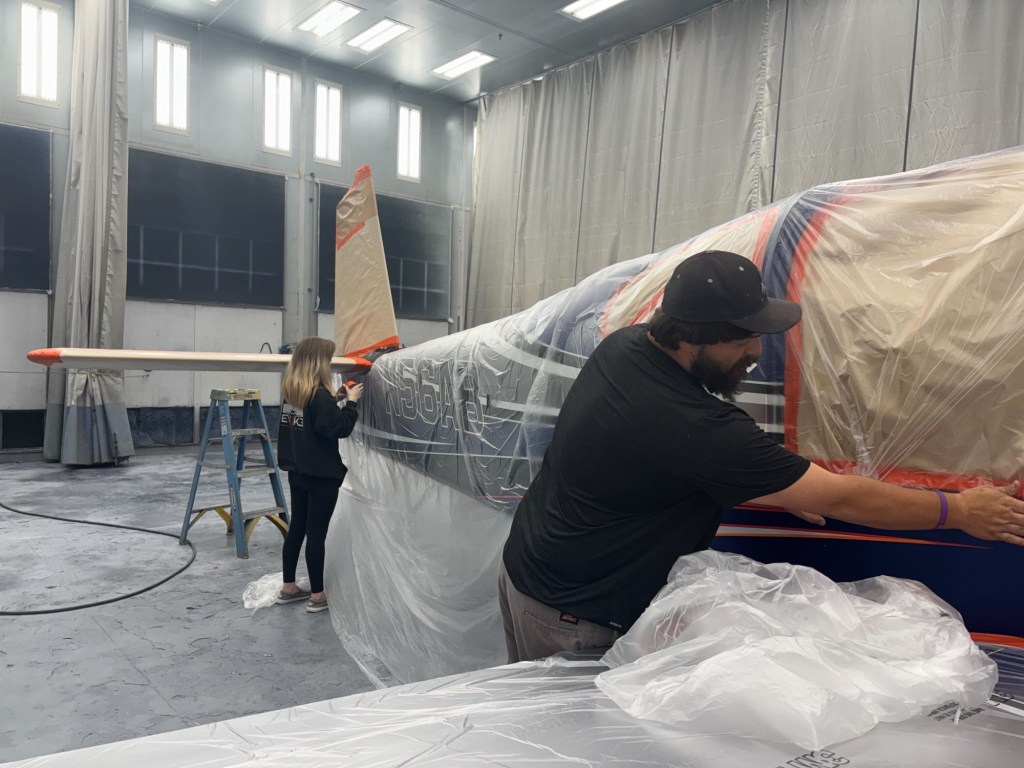
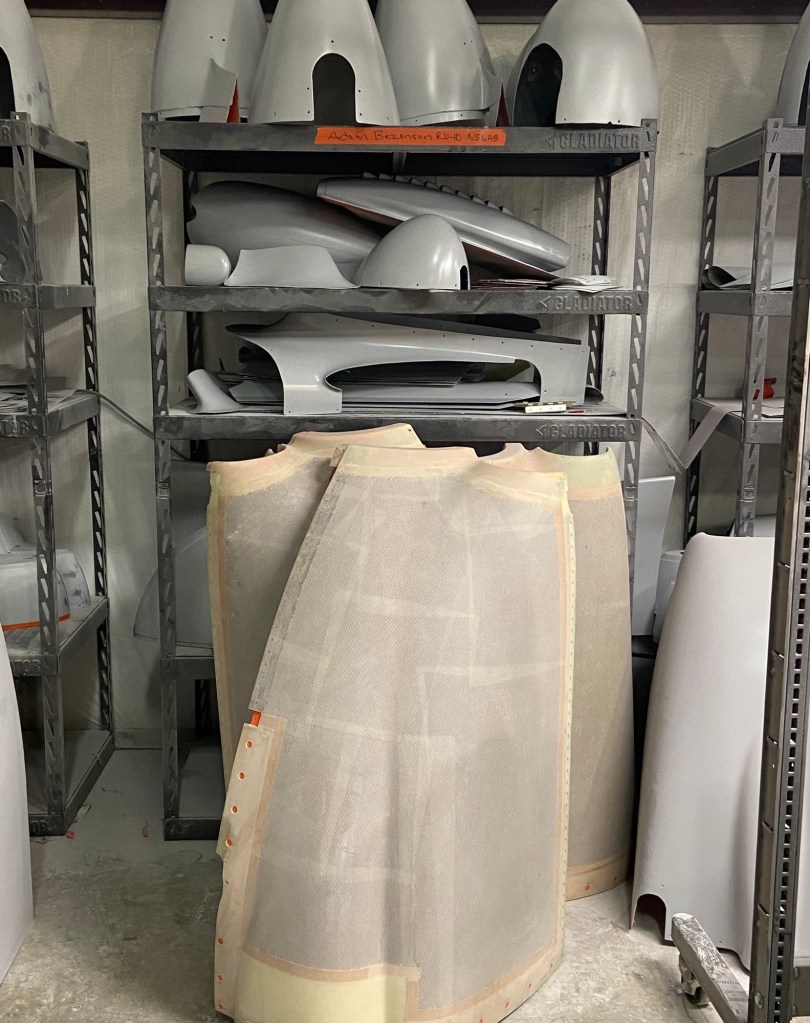
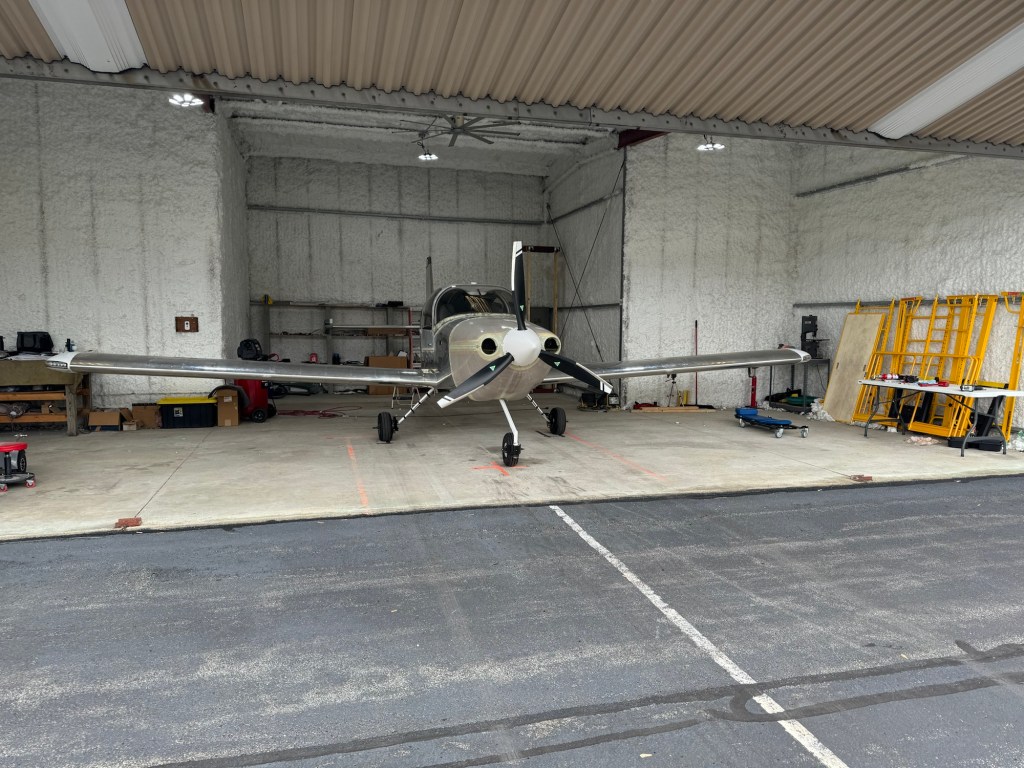
Below are some of the initial pics I took while it was still sitting in the drop off and delivery hangar.

Closeup of the wing walk area

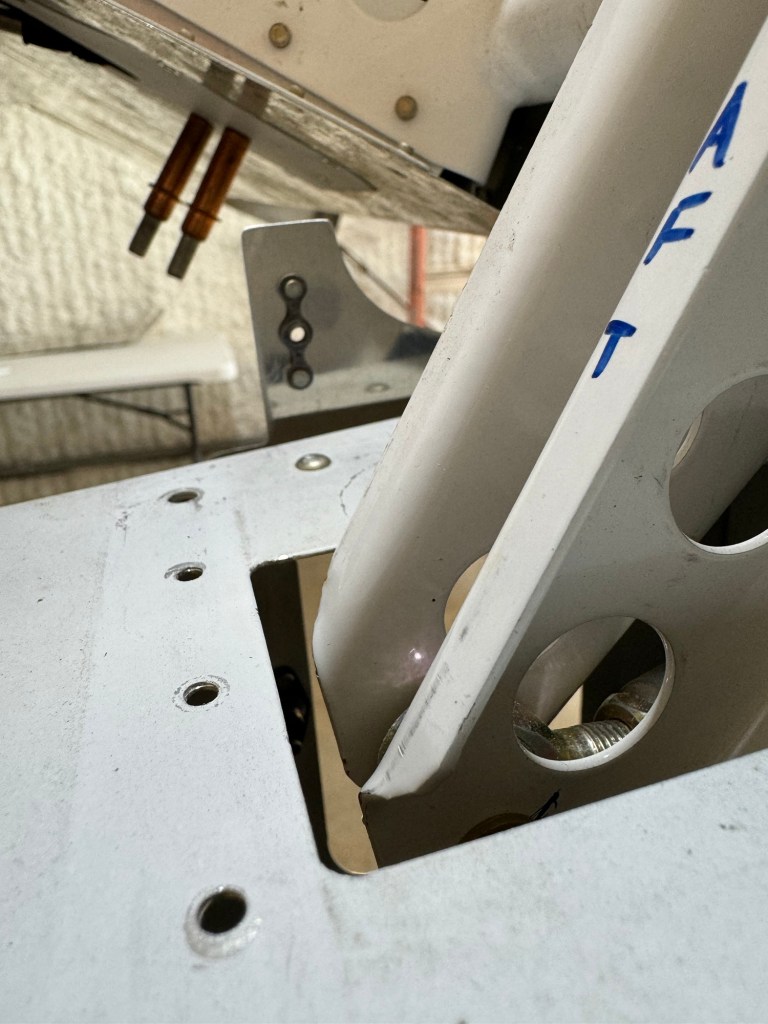
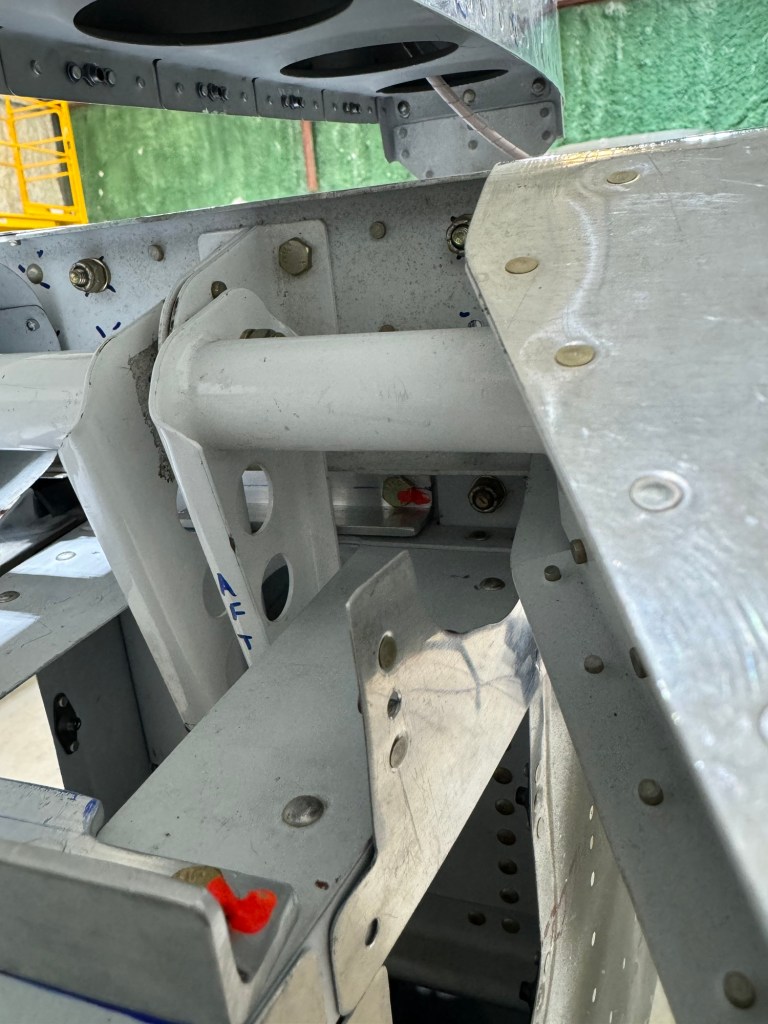
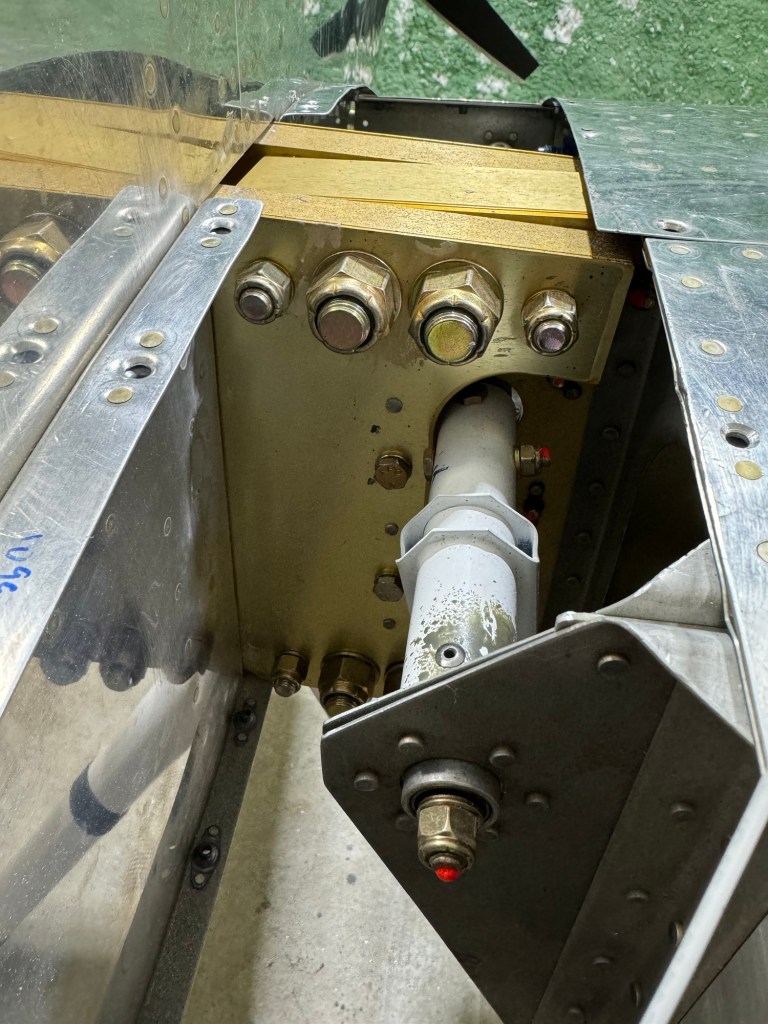
David assisted me in removing cover plates and other things to take a good look at the airplane for a preflight. Seeing all the control surfaces were removed, I really wanted to look over all the push rods etc… Everything was in order. David is the one person who takes the planes apart, takes photos of the process for documentation and reassembly purposes, and puts them back together at the end. That philosophy certainly helps when it comes to making sure things are put back together correctly. It also helps that they have painted tons of RV’s and are very familiar with them. After everything checked out, Johnathan and I finished a couple of last minute items, and then I re-checked the weather..

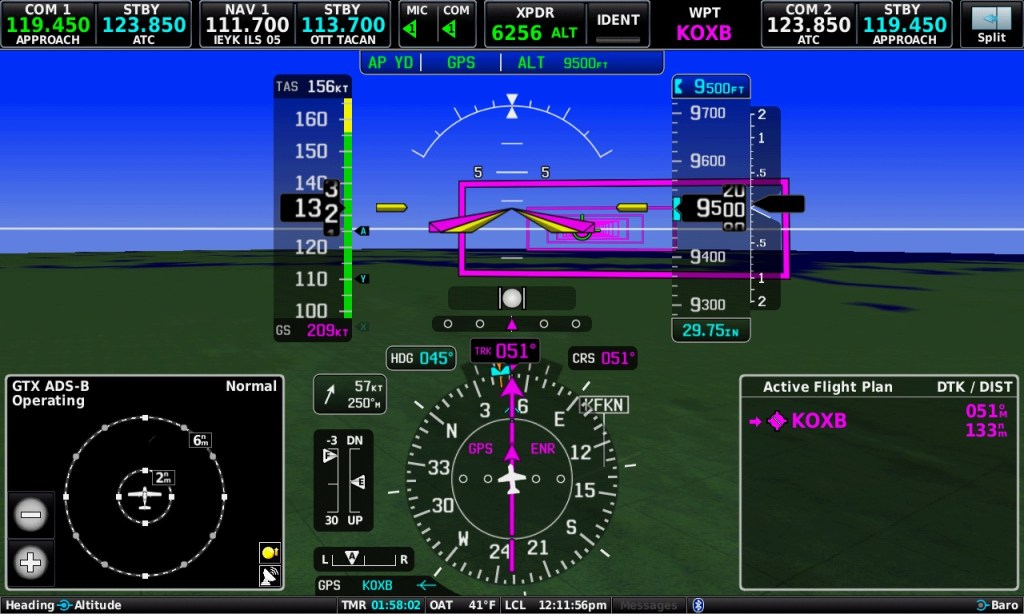
The weather was pretty socked in earlier in the day.. There was a stationary front over the entire state of AL. Everything around was very marginal at best.. Ceilings were 1500-1800′ in the general area. I had been looking at the VFR sectional charts for what I’d need for ceilings to go VFR.. I really wanted 2500-3000′, and I didn’t have it. I really wanted the first flight after paint to be VFR. I was sort of treating it like a maintenance flight, seeing flight surfaces were removed… Last thing I wanted was to launch into IMC immediately..

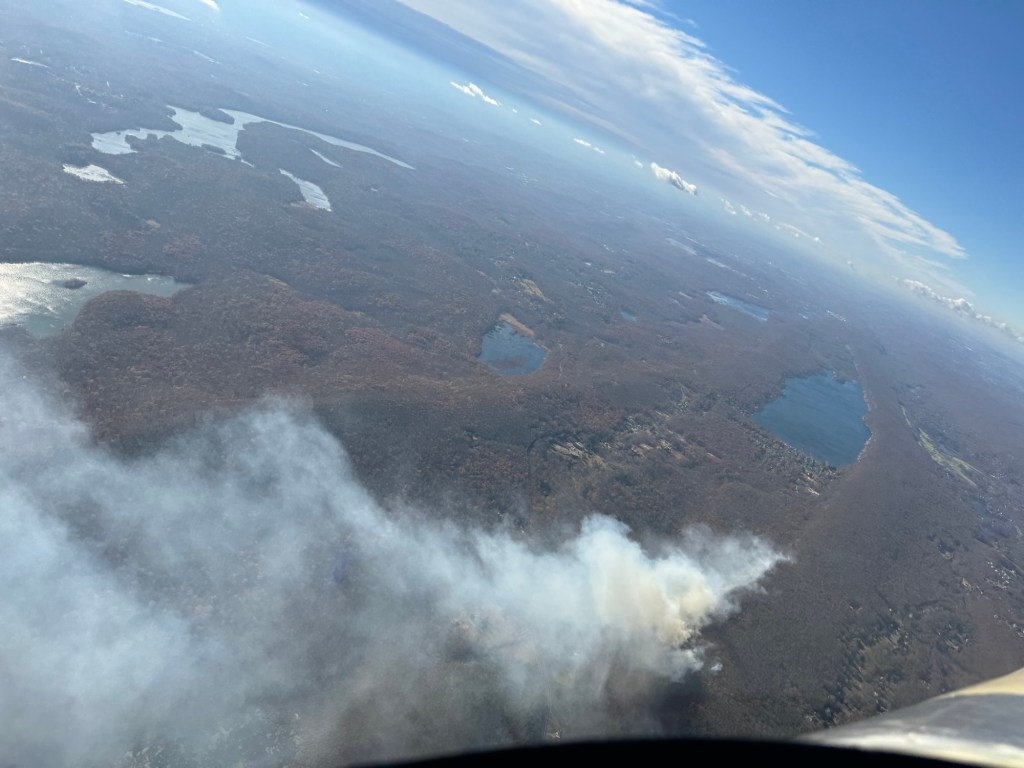
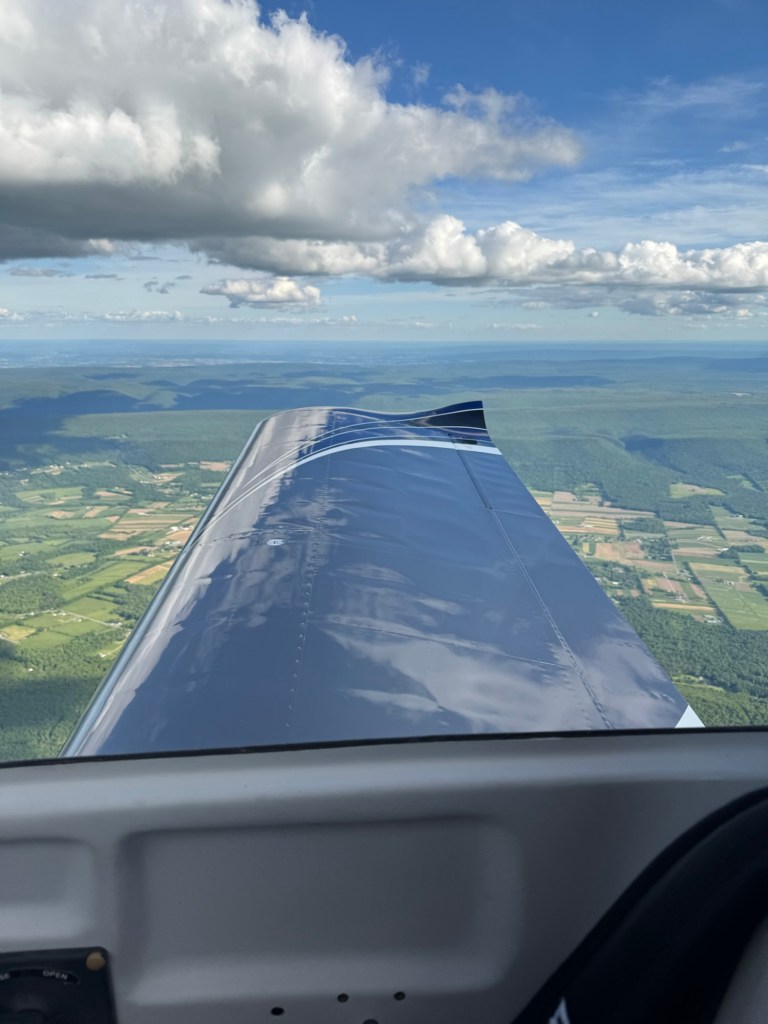
Thankfully just before noon, things were starting to break up as you can see in the picture below. It was scattered to broken at 1800′ with some large holes and blue sky above. I decided to give it a go and climb up through it to get on top. I knew once I got to Tennesse/Kentucky area it was going to be severe clear the rest of the way home. The path to the east towards Atlanta and Virgina area was really socked in and IFR all day.. So I chose to go north at first and then up the western side of the mountains headed for the Pittsburgh, PA area for a first stop. So we pulled the plane out..

Pulling the plane out for departure.

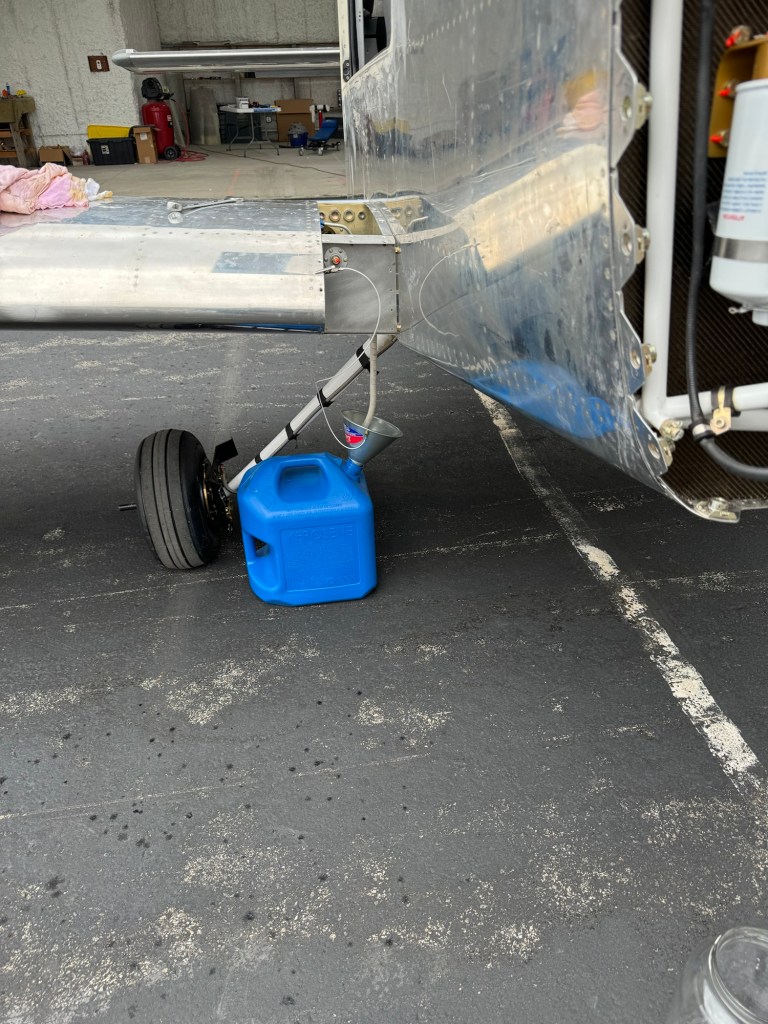
Seeing it was Memorial day, the gas truck wasn’t around, so I had to use the self serve.. A couple of hiccups happened here.. I initially went to start the engine, and it fired right up, however it ran really rough and quit.. Same thing happened again… before I realized that my gas gauge was showing empty on the right tank, which I thought.. hmm that can’t be right. I only flew a little over an hour on my last leg to get here.. I look down, and I’ve got the right tank selected… hmm lets try the left.. Much better..

I taxi over to the self serve and open the right tank. Sure enough, bone dry.. That’s odd.. As it turns out, I had a weeping rivet that they fixed prior to paint which necessitated draining the tank. I then go to fill up and the self serve pump isn’t working. It’s not powered on for some reason.. We suspect the thunder and lightning storm the previous night might have tripped something.. There was someone mowing the grass, so we were able to flag him down and he helped to reset the pump and got it working.. For a short time there I was thinking great.. I’m going to be stuck here another day because I can’t get gas on a Holiday.. No way I’m taking off with a bone dry tank.. that’s just asking for trouble.

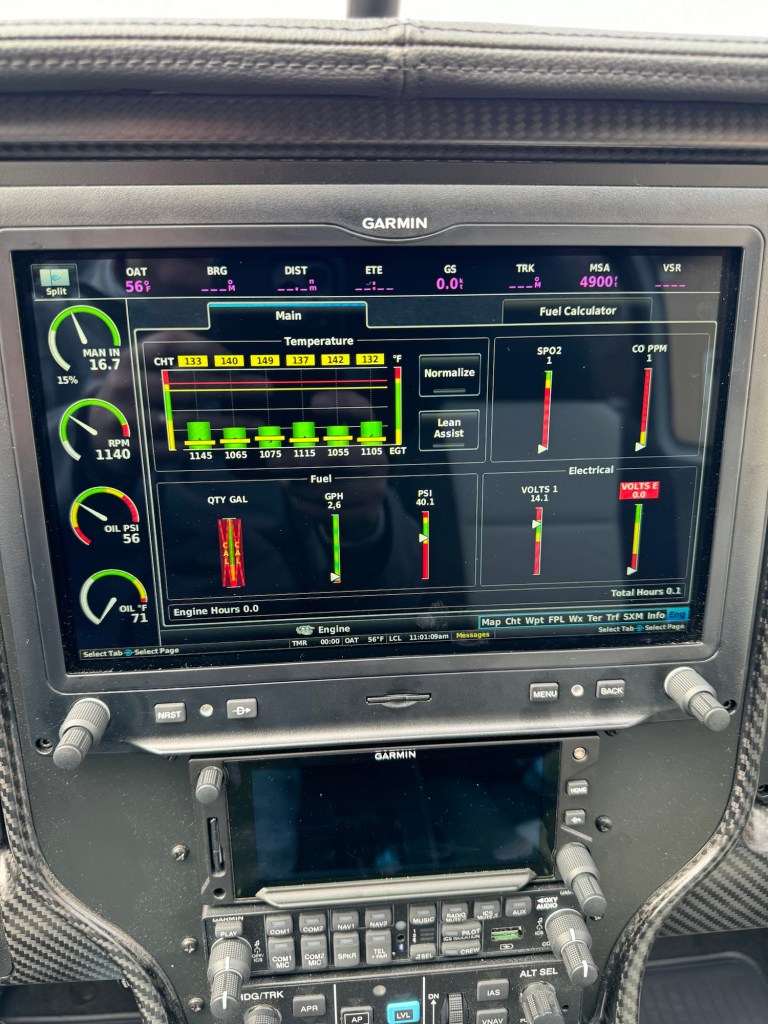
After filling up, the clouds are letting more and more sun through and it’s hot and really humid out on the ramp.. I get loaded up and head out.. Jonathan captured the taxi and initial departure.

Taxiing out headed home
Awesome departure shot just after takeoff

A couple of pics of the wings in various light conditions.

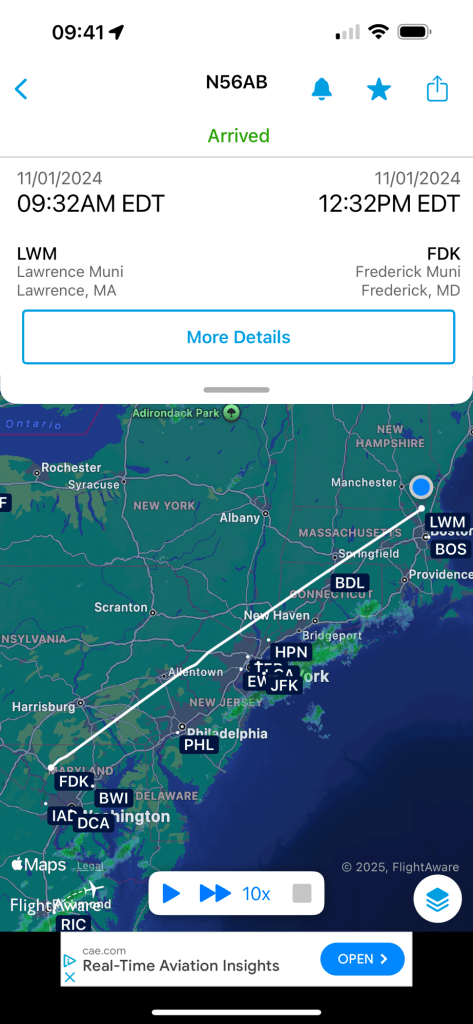
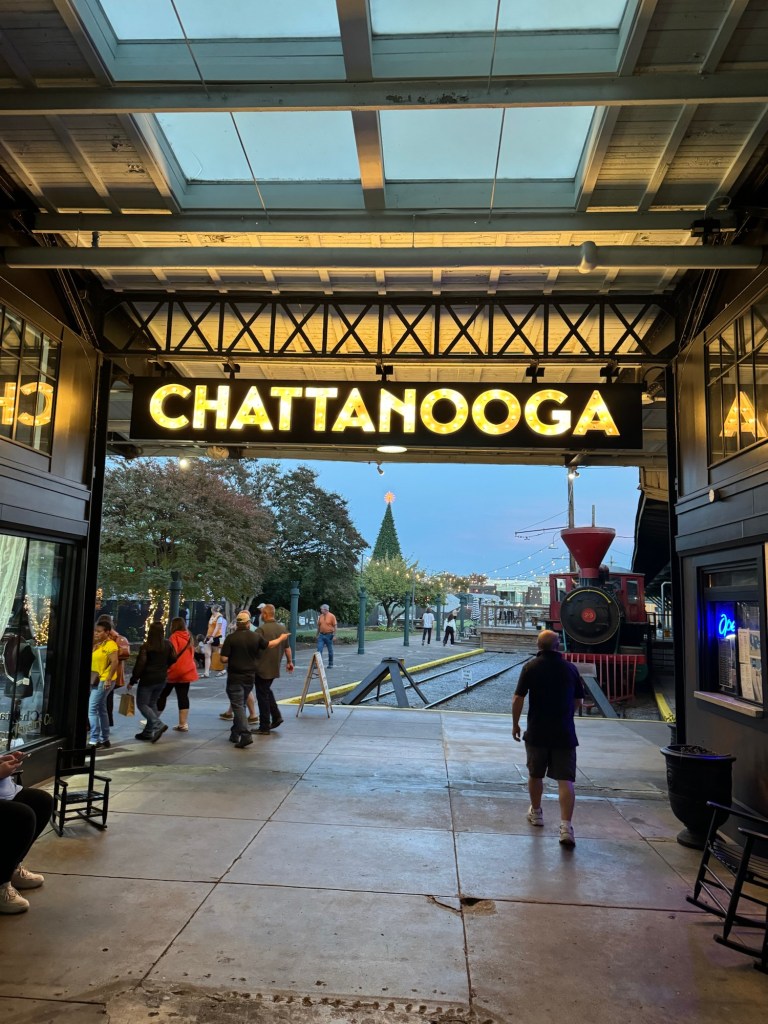
I ended up climbing up to 7500′ on top of the clouds.. As I got further north, the scattered/broken layer became a solid undercast below me, but about 70 miles later I crossed over the edge of the frontal boundary and the clouds below disappeared. into clear and a million. I ended up landing in Allegheny County just outside of Pittsburg, PA after a 3.5 hour first leg. Atlantic Aviation there was great.. They topped me off, I hit the bathroom and grabbed a hot dog and some peach tea they had.. Made for an excellent quick turn dinner. I then departed for the last leg home, which took me 3 hours. So 6.5 hours total to get home. The last leg had a few storms starting to pop up. I only had to deviate once about 20 degrees for 15 miles or so and once I got around that area of heavy precipitation, I pointed back direct home and any isolated cells that were around were far enough to the left or right that I didn’t need to deviate again.. All-in-all, a pretty uneventful flight and everything worked perfectly.

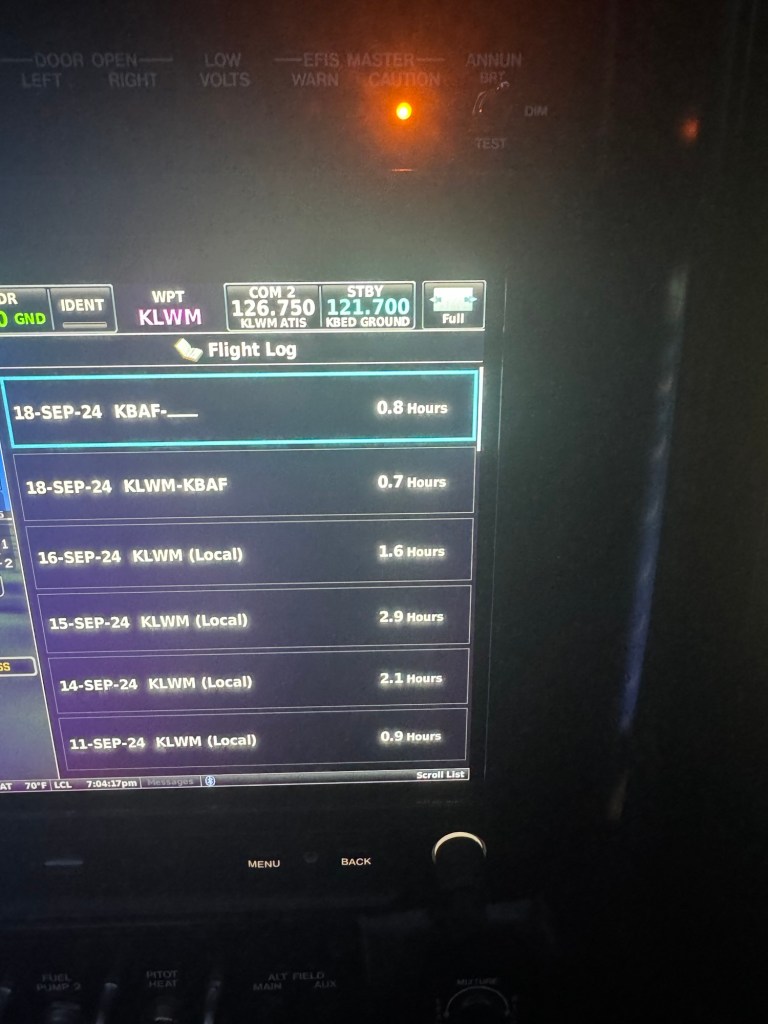
Below you can see the freshly painted bird tucked away back in the hangar.. The condition inspection is due at the end of May, so I basically just started working on it the next day to get it over with. That’s mostly over now as I write this, with the exception of a couple of minor things to finish up.

I can’t thank the Evoke team enough for making a vision turn into reality. The plane I built in my garage is now perfect. And while I say “it’s done”, we all know, it’s never really ever done.

Looking forward to the continued flight adventures that can now commence.

Paint update

Just figured I’d provide some updated pics of the painting process, seeing it’s been 6 months..

The bodywork takes up the majority of the time to make perfect. I’m sure it depends on how good the fiberglass is when bringing it in. I did my best, but there were certainly several areas that needed work. At some point it’s a trade off of just wanting to get the plane flying. I’d say my work was probably average.

The following pics are from various stages of the bodywork process.

Fiberglass pieces removed and organized
Control surfaces prepped and primed

Now onto the paint booth part.. This process moves along a bit quicker and is more predictable.

Masking
Painted
Closeup of the pilot door
Various touchups in process
Prepping for clear coat

And now for the most recent pic of the plane with a shiny clear coat applied. It looks stunning.

Clear Coat applied

It shouldn’t be long now before the plane is done and ready for pickup and the full reveal can be done. Looking forward to getting back in the air.

Time for Paint

I had my paint scheme designed back in 2020 by Jonathan at Plane Schemer (now Evoke Aircraft Design). I also was put on the waitlist for paint in 2020 or 2021 with a May 2023 drop off date. Of course, I wasn’t ready for that slot when it came up, so I pushed it out to October of 2024. Evoke Aviation has been really busy and drop off dates kept getting pushed out. When I looked at the schedule right around the time I finished up the plane, I saw my slot had pushed out to June/July 2025. I was sort of bummed. I really wanted my plane painted by Oshkosh 2025. Not long after that, I heard that Evoke was changing their waitlist to more of just a list without drop-off dates. Only the next 4-6 airplanes would be scheduled per quarter and you had to be flying!. It makes a lot of sense. With the amount of changes going on in peoples builds and having to maintain drop off date for a waitlist that is several years long. Having to adjust those dates all the time has got to be time consuming.

Looking at the list of planes in front of me marked as flying, I was figuring I might get in early 2025. However, Evoke contacted me to say they had a Nov 1st drop off date and if I wanted to take it. Yes! I do!

My friend, and CFI, Scott had asked if he could tag along for the trip, so we shoved off on Friday Nov 1st to drop the plane off at Evoke. My plan was to leave Friday and we had a commercial flight scheduled late Sunday afternoon in Atlanta. That would give us a couple of days to account for weather, if needed. The weather turned out to be decent for the majority of the day. It was, however, breezy. Another gusting into the lower 30 Kts on the surface kind of day. Winds aloft were also brutal and my plan to fly down to Frederick, MD area had us pointed directly into the wind. We stayed low at 4500′ to keep out of the wind as much as possible. Even so, we saw 40-50 Kts headwind on the nose.

Forest fire NW of New York Metro area

My original plan was to make the first stop at KCHO (Charlottesville, VA), via Frederick, MD to avoid the Washington DC ATIS area. However, the wind killed those plans. It was already looking like 3 hours just to get to Frederick and it was already lunch time. So we decided to stop a little early for a bio break and to eat our sandwiches that we brought for lunch.

The winds were really gusting and it proved to be a very challenging approach. I was fighting it with airspeed deviations of +/- 10kts. I, once again, made a smooth landing given the conditions.

First leg, which was SLOW

We then stayed to the east of the mountain range all the way to our 2nd stop in Canon, GA. This was a small little airport in the middle of nowhere with nobody around. Thankfully, we found the code to the door to use the bathroom, fueled up, and headed back out.

2nd Leg

The weather was very marginal through the hills between GA and our final stop in Gadsden, AL. Again, we were both constrained to VFR only as neither of us had been able to complete an IPC, despite our best efforts. South of Atlanta seemed to provide a VFR path around the weather and allow us to get in on Friday. We planned to head to the SE corner of the Atlanta bravo where the floor of the shelf was 3000′. So we ducked down to 2500′ and transited under the rectangular shelf of the Bravo. Once through, we then headed NW to our final destination.

3rd leg to the south of ATL

We pulled the plane inside the Evoke hangar and decided to come back the next morning to discuss the details and go over the plane and take a tour. It had been a long day of travel and it was a good idea to get some dinner and sleep. Scott and I headed to a hotel and grabbed a room, then headed downtown to Blackstone Pub on Jonathan and Autumn’s recommendation. It was yummy.

The next morning we met at 9am and Autumn and I went through the design and any last minute changes. We also picked out colors.

Final Color Selection

We went over the plane and discussed areas that needed attention etc.. Jonathan mentioned that it was just things that the typically see and nothing too bad. Then we took a tour of the facilities. We were originally thinking of heading to Birmingham for the night, however Jonathan and Autumn suggested Chattanooga, TN as an option with stop in Fort Payne for lunch about half way.

Fort Payne
Chattanooga Choo Choo

I recently got an update that everything had been disassembled, cleaned, sanded, and the aluminum has been treated.  Everything has been primed except for the engine cowlings. The rivets have been wiped as well. Almost everything is prepared for the bodywork to begin

My Fiberglass parts
Primed EMP/Wing pieces
As the plane currently sits.

Here is the final scheme. I do feel like the blue here is a little lighter compared to what it’ll be in real life.

The Evoke team puts so much effort into the body work and making the fiberglass perfect. As a result, it’s a really long process. I was told 4-5 months, but I’m, of course, counting on 5. So I should be getting the plane back sometime in March.

Trip to Savannah, GA

With it being our 10 year anniversary this year.. One of the things we wanted to do was to return to Savannah where we got engaged. Seeing we didn’t make it down for the actual date, we decided to hold off until fall when the weather was a little more tolerable down there and the plane was done and past phase 1. We opted to schedule the trip for Columbus day weekend. I took Friday off to give us a 4 day weekend.

We were blessed with perfect weather as High pressure moved in after the hurricane moved through. On the trip down Friday there was not a cloud in the sky and a slight tailwind the whole trip.

Beautiful Day to Fly

Jeanine sat in the back to keep Declan occupied with games, etc…

With the slight tailwind, we made great time heading down. About 5.5 hours total time. We stopped in Suffolk, VA for gas and they also have a decent restaurant right on the field, which was good for a relatively quick lunch turn around.

First Leg
Second Leg

We had fun exploring the city. From watching the cargo ships come up and down the river, to the beautiful tree lined streets, the architecture of some of the buildings, and the lovely squares.

Below are some of the pics of the trip.

As the weekend went on, I was watching the weather closely. The majority of the route for home on Monday (as far north as NY City area) was looking clear except pretty windy. However, there was a cold front over New England that was causing lots of uncertainty in the forecast. The forecast continued to show low clouds and visibility improving to VFR by 2pm. So if that forecast held it looked like we could make it all the way home on Monday. Note: I still needed an IPC at this point, so I was restricted to VFR on this trip.

We decided to make a backup plan, and reach out to our friends Gary and Mary in Ocean City, MD. If nothing else, we would make it a fuel stop, catch up, and continue north. Plan B was: we would stay the night in Ocean City and continue on in the morning when things were forecast to clear up in the New England Area.

We launched Monday morning for an approx 1pm arrival in Ocean City. We climbed up to 9500′ to get above the lift line and out of any bumps. The surface winds were gusting in to the high 20kt range, so I expected some bouncing around on the flight, however it was really smooth up at 9500′. Something that never seems to happen is to have tailwinds on both ends of a trip like this. However this day we had some massive tailwinds that just kept getting better as we moved north along the frontal boundary. Those tailwinds had us cooking along at over 200Kts ground speed for the majority of the trip. We made it 475nm in exactly 3 hours.

Winds at Ocean City were challenging, but thankfully mostly down the runway. The winds were 310@18 Gusting to 35Kts. I fought the gusty winds on final, but still made a pretty smooth landing.

Gary was able to capture a video of our landing

Below are a couple of pics of our GS and engine settings/temps.
Nearly a direct 60kt tailwind
Decent view of how the engine temps look

When we landed around 1pm, Our home airport was socked in at 400′ Overcast. I was expecting it to at least start lifting by now if it were to actually be VFR by 2pm. Given it wasn’t holding to forecast, I didn’t have much faith that it would suddenly get better. At that point, we decided to stay the night in Ocean City with our friends, who graciously offered to stay with them. We had a great time catching up over a late lunch and at the house that evening. As it turned out, our home airport was still pretty socked in at 9pm that evening, so we made the right call. Refreshed from a good night sleep, we ventured out to breakfast and then we got dropped off at the airport, loaded things up, and launched for home. It was an enjoyable flight at 7500′ and around central MA, we descended down to 3500′ to get below a cloud layer. It was a little bumpy below the clouds for the last 25 minutes or so of the flight, but given the gusty conditions for the whole trip home, I was impressed that only 25 minutes of the trip was a little bumpy.

Some shots of the flight home.

We so thoroughly enjoyed our first weekend away with the plane as a family. It provided a good test run for more trips to come. Wrapping up the weekend: we had 11 hours of flying across about 1600nm of distance to get down and back

First Passengers!

After putting up with me building this thing over the last 8 years, it was only right to have my family be the first passengers now that I’ve finished my phase 1 flying.

We decided to head out for dinner at an Asian Fusion place on the airport at Westfield, MA. It was a very smooth night and nice for a first flight with passengers.

The first victims.

A nice night to fly, and it looks like I need to wash this bird as you can see the marks from wiping the wings down with cleaner and towels.. Clearly not a great job. 🙂

A couple of pics of the flight log on the EFIS and the flight track to dinner.

Lots of flying.

Phase 1 Testing

This post is several months after first flight. The main issue I saw during the first flight was my % power indication was way off. It read something like 40% at a very high power setting. This ended up being a simple configuration issue with my fuel flow setup. The vendor had set it up for the “Red Cube” that they provided, however my source was from the SDS ECU. The k factor was off by quite a bit. I spent some time getting this correct by filling the tanks, taxiing and taking off on one tank, and then cruising at a constant power setting at the same altitude for 30-60 minutes, then switch back to the other tank. The amount of fuel burned in that time was compared to what the EFIS said for fuel burn.

For the most part, I followed the EAA flight test cards as a guide for what tasks to perform. I also ran high power settings for quite awhile to make sure I properly broke in my engine, so some of the test cards had to wait several hours.

In the meantime, I did some work to address some baffling issues and adjust mixture with the SDS ECU in controlling CHTs. It took some time, but by the end of phase 1 flight testing, I was happy with my engine temps.

No other major issues surfaced during the test time. The plane flew well with no bad characteristics. I finished up my flight testing on September 17th, 3.5 months after making my first flight.

It Flies!

A couple of videos of the first flight from today.

The weather was good today for a takeoff from my preferred runway, 5 although the wind was a bit variable, it was fairly light. Tomorrow looks to be favoring 23, which puts me over the city, which I didn’t really want. So I chose today to go for it.

I’ve spend a decent amount of time over the last couple of weeks sitting in the cockpit and going over things.. checklists, and developing flows. So I felt as ready as I was going to be.

Thankfully it was an uneventful flight. No major issues.. just a couple of things that I need to look into, which is pretty typical for first flights. I circled the airport between 2200-2500′. I did left and right turns, and I pulled fuel from both tanks. CHTs were reasonable. And a decent landing, which I credit transition training for. Now to get on with phase 1 flight testing.

Officially an Airplane!

One of the next things to do was a weight and balance on the plane. I used the EAA chapter scales, got the plane level and weighed the plane with and without wheel pants. The main thing is to make sure the plane is in flight level attitude, which I accomplished by raising the main gear up about 2″ and keeping the nose wheel scale on the floor. Some fine tuning was done by letting some air out of the nose wheel.

With all the creature comforts I put in.. she’s a bit heavy. With the wheel pants, it weights 1806. With a max gross of 2800lbs, that puts me just under 1000 pounds useful load.. Of course before paint. That will add another 40-50 lbs.. So I’ll be mid 900’s in the end. For our primary mission with 3 people plus bags.. that’ll work just fine.

Lots of time spent preparing for the inspection working down my list.. until I had nothing else to do. Below is the plane all ready for inspection.

The DAR inspection was scheduled for May 29th. A little over 8 years since starting my first pieces of the empennage. Prior to this date, I had my Tech Councilor come by and do a pre-inspection. Nothing was really found.. He made about a dozen minor suggestions, which I addressed in the couple of days following his visit. I also had a couple of other builders at my field come by to take a look.. Can never hurt to have more sets of eyes on things ahead of the actual inspection..

May 29th came and the DAR arrived around 1:30pm. Inspection took place with lots of conversation, asking questions of me, and looking over the airplane. Once he was satisfied, we sat down to do the paperwork… There’s a lot of it! He printed out my airworthiness certificate which is part of my operating limitations to be kept in the plane with the registration and W&B info. So as of May 29th.. I now officially have an AIRPLANE!!!

It’s time to get this bird in the air and fly off my Phase 1 test flights. I have been working on checklists, emergency procedures and cockpit flows as I’ve had some time to start to prep myself mentally for the upcoming first flight. I also went down to PA to see the Van’s East Coast rep to do some transition training in the factory RV-10. Another step to get myself ready to fly (and also satisfy my insurance requirements of a checkout in type.).

Holding my Airworthiness Certificate

The Engine Roars to Life

In prepping for first engine start, I first had to get fuel flow testing done. I started out by putting 5 gallons of fuel in each tank sloshing it around a bit and draining it back out by pulling the sump drain. This flushed the tank of any construction debris, which there were only a couple of small metal chips found.

For safety sake, I had my extinguisher out and ready at all times, and I also bought a metal funnel which I bolted on a wire to with an alligator clip on the other end to ground to the airplane skin. On this same bolt, on the inside of the funnel, I attached a long piece of safety wire which went down through the funnel and was extra long to sit inside the container catching the fuel so it was touching the liquid as well. I also grounded the airplane with a separate wire to the metal hangar building, although this is less important as it is to have the funnel and container/liquid at the same potential as the airplane so no static can build up.

I then put 5 gallons back into each tank and ran each fuel pump, checking for leaks as fuel was circulating through the whole system. I adjusted my fuel pressure regulator to 46psi statically with the engine not running.

Fuel Pressure!

Then it was on to the fuel flow tests. First I pumped all the gas out by unhooking the return hose and running the pump until it cavitated. Then I collected what was left in the tank via the drain sump. A very small amount was left in each tank.

Then fuel was added back to the tank and again the return hose was used to fill a 1 Gallon glass container while the pump ran for 1 minute in a flight level attitude. I almost filled the 1 gallon in a minute.

Weighing it, I got a little over 4 lbs. Avgas is around 6 lbs/gal and the temps were in the high 40’s low 50’s, so the density of the fuel should be close to the 6 lbs/gal. Doing the math to convert weight per minute to gallon per hour nets me > 48 Gallons per hour delivery. I did each tank twice once from each fuel pump to make sure each pump can deliver at least 150% of what the engine needs at full power.

I then lifted the nose up as much as I could before the tail hit to simulate a nose up attitude. The 4 tests were repeated and netted close to the same results.

Then it was on to putting oil into the sump and filling the oil cooler.

Once things were oiled up, I left the top plugs out, disconnected the bottom plug wires, shut off the fuel and ignition, and cranked the engine to pre-oil the engine. This ends when you start to build up oil pressure as shown below.

Oil pressure

After spending some time double checking that the SDS system was seeing the flywheel magnets, programming all the gauges for green/yellow/red range markings, etc… I was confident that I was ready to try to start the engine for the first time. I used my truck to strap the plane to just in case something happened with the brakes. Fire extinguisher at the ready.. and I asked a fellow EAA member to come by to keep an eye on the engine while I ran it for about 3 minutes. I ran around 1000 RPM for a minute and a half or so, and then went to 1700 RPM and cycled the prop a couple of times successfully.

A quick snap of the engine gauges while it was running. Everything seems normal.

I let the engine cool down and then ran it one more time before putting it away for the day.

I’ve since been able to do some short taxi tests to set the brakes and also calibrate the magnetometer. Now it’s time to do W&B and get ready for the inspection.

Wings finished up

I test fit the fuel supply and return lines in the wing roots. Everything looked good once I clocked the sidewall bulkhead fitting downward a bit. I plan to put some tubing on the fuel line to avoid abrading the spar and side skins.

Left side before return line clocking.
Looking at the supply shutoff/filter setup.
Looking up on the whole supply line/filter
Right side after clocking

I then went down the road of finalizing my rigging. Everything went well except for my elevator rigging, which was somewhat expected. I was fighting a couple of different things. The first was that my stick hits the switches on the Aerosport panel, like so many before me. Some end up bending their stick to get more clearance. I decided to solve it by adjusting the forward and aft stops as well as changing the aft rod end of the forward (F-1089) pushrod from a MD3614M to a MD3616M to get more thread length to allow me to unscrew it more, resulting in the stick not going as far forward, while still having enough thread engaged in the pushrod.

Additionally, I was very close to needing to do the elevator stop service bulletin. So I took the opportunity to do that as well. To do these changes, I needed to take the rudder and Vertical Stab off to get better access.

Unbolting and unriveting the original aft elevator stop.
Stop completely off
Showing the elevator horn angle and how close it is to being able to jam on the stop.
New aft elevator stop installed to address service bulletin and adjust travel as needed.

I also installed a forward stop as well to help further limit the down stick travel by limiting elevator down travel to the min of 20 degrees.

Horn sitting against new forward stop installed

I then battled another issue with the control stick travel and a bolt head hitting the control column mount. This seems to be due to the angle of the stick weldment not being 70 degrees. It is causing the travel in the space cutout for the aileron pushrod to be biased forward as shown below.

Stick aft rod is completely forward
Stick forward only 3/4 travel in slot

Van’s tells me that this is usually due to the pushrod lengths being off. So I spent a ton of time removing all 3 of my pushrods and re-checking their lengths. They were really close as they were. Then working on setting things up properly from aft to front. At the end of the day, even with the stock measurements of the pushrods, I still have the same issue, so that is not the root cause.

Below I show the interference with the bolt and the mount.

You can see where the bolt was hitting.

So I decided to carve out a half moon as shown above in the mount to create clearance for the bolt. At least one other builder has told me they have seen this a bunch of times and done the same thing.

One other problem that resulted from this forward bias, is that the aileron pushrod that connects the 2 sticks through the tunnel was rubbing on my fuel lines as shown in the video below.

There was no possible way to move the lines forward anymore due to me having a brake line in the way.

In talking with Tom, I asked him to make 2 new lines for me that were 1/2″ longer to solve this issue.

New lines in place and rubbing problem solved.

With that saga behind me, I then bolted the wings on permanently. There are 8 bolts holding each wing on.

I also finished wiring the wings. Below is the air temp sensor under the 2nd access panel on the right wing.

Wingtips were also installed and tested out.

Now there are a couple of things left to finish up and then it’s time to get ready for my inspection. Calibrating gauges, fuel tanks, doing fuel flow tests, etc…